Windows Quickstart Guide
This topic describes how to install Schrödinger’s Release 2026-1 software for use on a single
If you run into issues, see
There are four steps to get started using Schrödinger software:
-
Download the software on the machine you will be using the software.
-
You will need a Schrödinger account. This grants access to software downloads, documentation, training, webinars, and more.
-
You will need a license. If you do not have a license, you can request a trial license here or access the software in Online Certification Courses.
-
-
Install the software:
-
Configure Licensing: See Schrödinger License Manager Instructions.
-
Configure Job Settings: See Running Schrödinger Jobs.
Install the software
Open zip file
| 1. | Navigate to where you downloaded the software. |
| 2. | Right-click on the downloaded zip file (the name starts with Schrodinger_Suite) and choose Extract All. |
A panel opens so you can choose the destination where the extracted files will go.
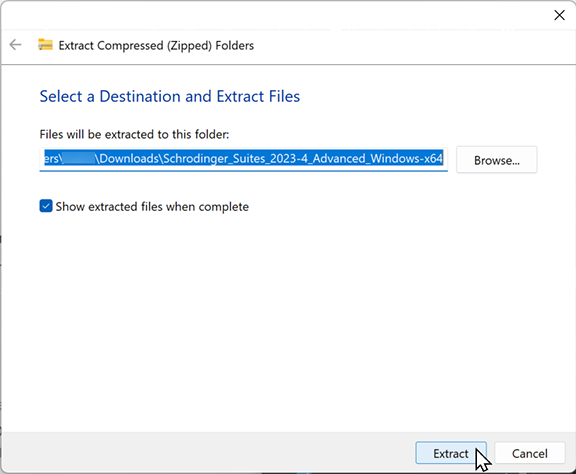
| a. | Leave the destination at the default or click Browse to Select a folder where the files will be stored. |
| b. | Show extracted files when complete is selected by default. This allows you to confirm that the software was downloaded successfully. |
| c. | Click Extract. |
| 4. | Navigate to where you saved the files. Double-click the folder that starts with Schrodinger_Suite (there should be only one folder). |
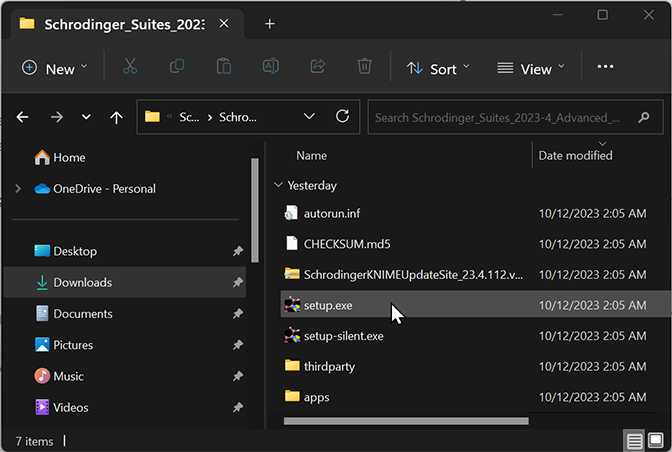
| 5. | Double-click setup.exe
|
-
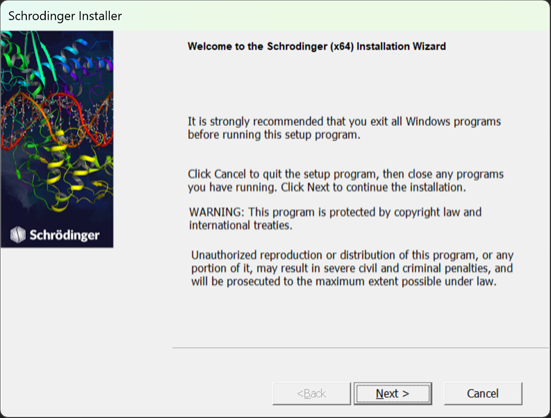
A Warning dialog will open that asks if you want to allow this app to make changes to your device. Click Yes.
-
It is strongly recommended that you exit all Windows programs before installing the software. You can click Cancel to quite the setup program, close any programs that are running, and then start the setup process again.
Installation Wizard Opens
-
The Schrödinger Installation Wizard opens. Click Next to continue the installation.
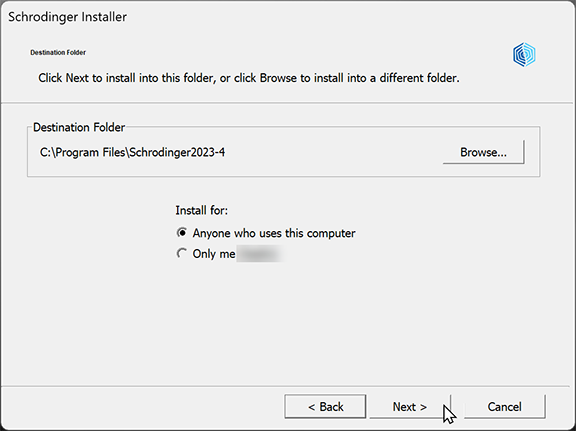
2. In the Destination folder step, click Next to accept the default location and user.
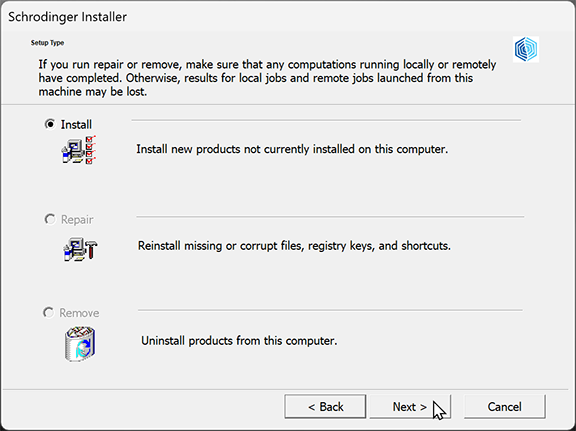
3. In the Setup Type step, a window opens showing 3 options. click Next to accept the default for Install (if a different option is showing as the default, see below):
-
Install - this is the default if the version of the software you are downloading has not yet been installed on the machine.
-
Repair - this is the default if you have already installed the same release version of the software on the machine.
-
Remove -this is the default if you have a prior installation of the same release version on the machine. You must uninstall the prior installation before you can install the software again.
Note: If you have any Schrodinger applications open, you will be prompted to have the installer close those applications before continuing the uninstall process.
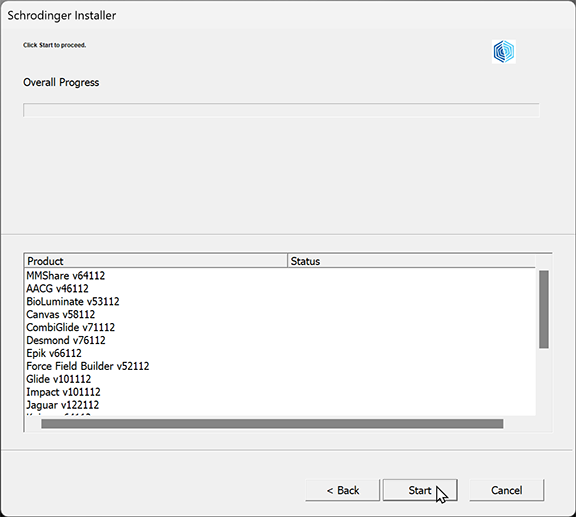
4. In the Start step, click Start to begin the installation.
-
The products included in the installation will be shown in the window.
Note: If your virus checker objects to any executables, allow the executable to be used.
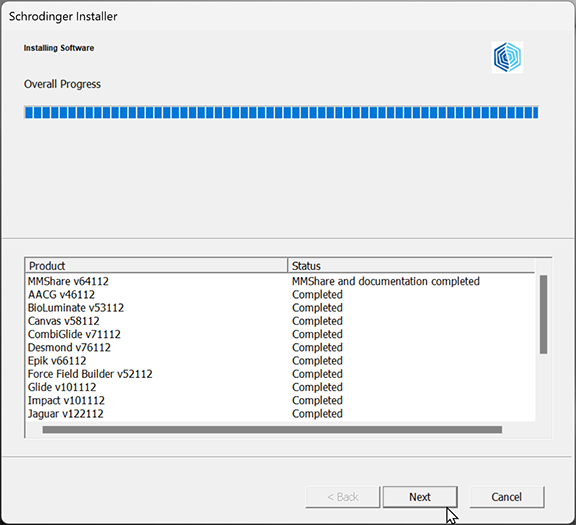
5. When Overall Progress is complete in the Installing Software step, click Next.
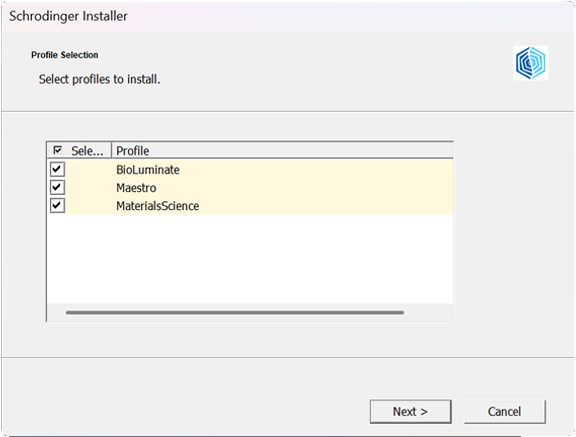
6. In the Profile Selection step, all available application profiles will be selected by default. Click on any box to deselect ones you don’t want installed. Click Next.
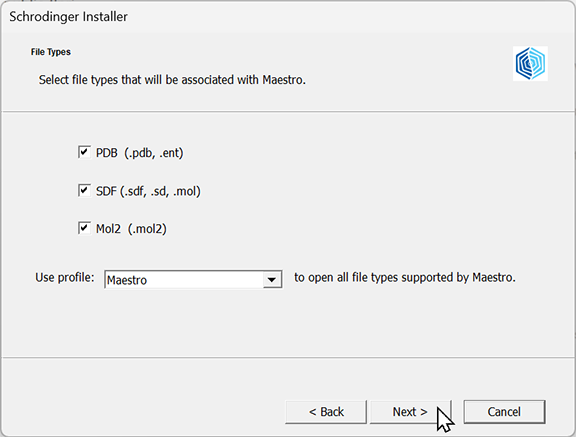
7. In the File Types step, all available file types will be selected by default. If you have multiple profiles installed, Maestro is the default profile which will open those file types by default. Otherwise, your installed profile will be selected. Click Next.
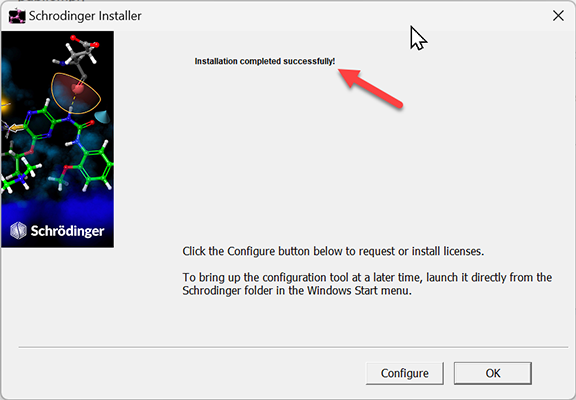
8. Installation completed successfully! will be displayed.
-
Click Configure if you need to install your license (see Install the license below)
-
Click OK to finish installation and install you license at a later point from the Help menu in Maestro (if you installed the free version of Maestro, click OK, as the license is already installed).
Checking the installation
| 1. | Double-click the Maestro icon on your desktop to start Maestro, to check that Maestro is properly installed and licensed. |