Viewing, Managing, and Using Measurement Data
The data from all the measurements in the Workspace is available in the Measurements Toolbox.
You can open this toolbox by right-clicking on the Measurements button, or pausing the pointer over this button, then clicking the ellipsis button that appears above it.

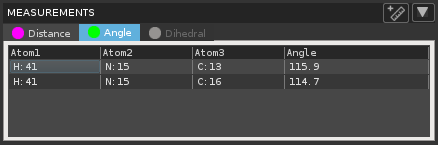
The measurements are classified by type (distance, angle, dihedral) and listed in separate tabs. The color dot on each tab shows the color of the marker in the Workspace.
The tables list the atoms involved in the measurement and the value of the measurement. The atoms are identified as element:index, where index is the atom number in the Workspace. For ring measurements, the element is replaced by RCEN for "ring centroid" for the atoms picked. The third "atom" for the angle between ring planes has the element replaced by RX, and the index is simply a sequential index. For dihedrals the residue and the name of the dihedral are reported as well. If the angle is not a protein angle, the name is constructed from the atom names.
You can delete measurements from this toolbox:
- To delete a single measurement, right-click on a measurement and choose Delete.
- To delete all measurements of the currently selected type, click the arrow button in the top left and choose Delete All type.
- To delete all measurements of all types, click the arrow button in the top left and choose Delete All Measurements.
Although measurements are stored only while the measured objects are in the Workspace, you can create entry properties from measurements, and save sets of measurements to a file.
The entry property that is created for a particular measurement is evaluated for the selected entries in the project. It uses the atom numbers from the Workspace to do the calculation. This means that the measurement for those atom numbers must be defined and relevant for the selected entries. Usually this means that the structure in the Workspace and the structures in the entries are conformers, or enumerated structures where the variations have higher atom numbers than the measurement. There is no restriction that the atoms should be in the same entry. If the measurement spans entries, you might not get a meaningful measurement property. If the property already exists for any of the selected entries, the values are replaced.
To create a property:
-
Right-click on the measurement and choose Calculate Property, in the Measurements toolbox or in the Workspace.
The Calculate Measurement Property panel opens.
-
Change the property name, if you don't want to use the default.
-
Click OK.
The property is added to the project and evaluated for the selected entries.
If you want to save the measurements of a particular type, click the arrow button in the Measurements toolbox, and choose Export type. A standard file selector opens, in which you can name the file and choose the file type. The measurements are written in CSV format, with the table column headings on the first line, followed by a blank line, then the data from the table.