Job Monitor Panel
Use the Job Monitor Panel to manage and monitor the progress of any computational job run with the Schrödinger Suite.
To open this panel: in the Maestro main window, choose Window → Job Monitor , or click the Jobs button on the toolbar, then click Monitor.
- Using
- Features
- Additional Resources
Using the Job Monitor Panel
The Job Monitor panel is used for showing information on jobs, monitoring the progress of jobs, and managing jobs. The information is obtained from your jobs database. You can use the Job Monitor panel to monitor all your jobs, regardless of whether they were started from Maestro or not.
The Job Monitor panel consists of two connected panels. In the Jobs List panel, the status jobs which are displayed.
Double-clicking on a job in the Jobs List panel takes you to the Job Details panel, which show additional details about the job and displays job files.
Before using the Job Monitor panel, you must first register with Job Server in the Register with Job Server Panel.
Job Monitor Panel Features
-
Jobs List panel
-
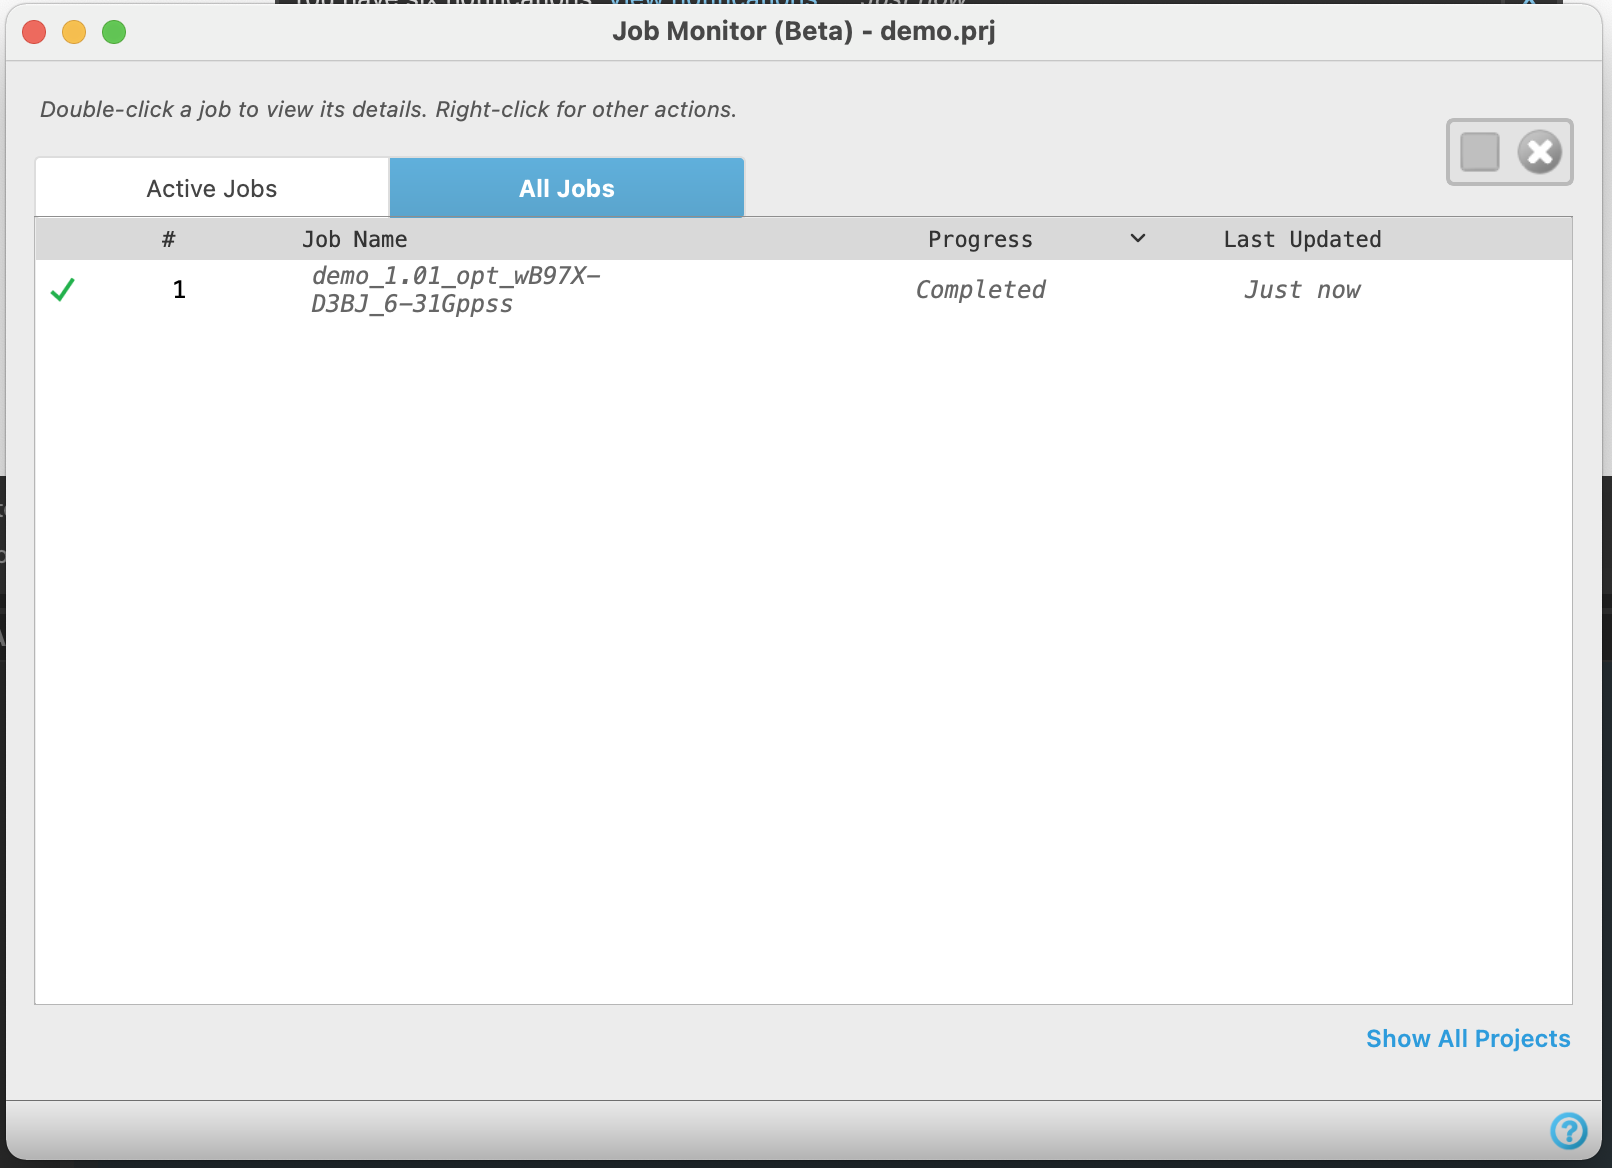
This panel displays the status of active jobs which are running as well as all jobs that have been initiated by the user. The contents of the table are updated periodically. Subjobs are not be listed and can be instead accessed in the Job Details Panel by double-clicking the parent job.
- Active Jobs tab
-
The Active Jobs tab lists jobs that are waiting or running in the Job Status table. Once a job is no longer waiting or running, it is no longer listed in the Active Jobs tab.
- All Jobs tab
-
The All Jobs tab lists jobs of all statuses in the Job Status table.
- Stop button (
 )
) -
Stop a running job and preserve the current output files. This function is only supported for a few applications of the Schrödinger Suite (Desmond, Jaguar, and MacroModel). To stop a job, click on a job in the Job Status Table. If a job is able to be stopped, the gray button changes to orange.
- Cancel button (
 )
) -
Cancel a job which has a waiting or running status. The job is immediately terminated and output files are not retrieved or preserved. To cancel a job, click on a job in the Job Status Table. If a job is able to be canceled, the gray button changes to red.
- Job Status Table
-
The Job Status table lists jobs started by the current user. The following table lists some common table actions:
Action Description Click on header Sort the table rows by clicking the column header by whose values you want to sort. After clicking on a column header, an arrow will appear to its right to indicate whether the rows are currently being sorted in ascending (˄) or descending (˅) order. You can toggle between sorting by ascending or descending order by clicking on the arrow. Double-click on row Monitor the job and see associated files. Opens the Job details panel. You can also open this panel by hovering over a row and clicking on the arrow that appears. Right-click on row Opens a menu to Collect Diagnostics or Delete the Job Record. If Delete Job Record is selected, output files of the job will be deleted and the job will not be listed in the Job Monitor. Shift + click Select multiple rows - #
-
The job number, given in the order that jobs were submitted. If a job is removed from Job Monitor by right-clicking and selecting Remove Job Record, the job number automatically updates to account for the change. This number is not the same as the Job ID.
- Job Name
-
The name of the job. The job name can be specified on the Job toolbar or in the Job Settings Dialog box when you start a job from Maestro. Job names can also be specified on the command line.
- Progress
-
The progress of a job. An indicator icon is show on the left side of a row to reflect the progress of the job as well. A job can have one of the following statuses:
-
Status Description Indicator Waiting The job was submitted successfully to the Job Server and is waiting in the queue for compute resources. 
Running The job is running. 
Completed The job finished successfully. An hourglass icon appears next to the text while job files are downloading. 
Canceled The job was canceled by the user, either by using the Job Monitor panel in Maestro or on the command line. Canceled jobs do not return intermediate results. 
Stopped The job was stopped by the user, either by using the Job Monitor panel in Maestro or on the command line. Jobs killed by the queue (e.g., due to exceeding wallclock limits) will also display a stopped status. Stopped jobs return intermediate results. 
Failed The job did not finish successfully; for example, the application running the job crashed, or the calculation didn’t converge 
- Last Updated
-
The time and date at which the job files were last changed.
- Show All Projects/Show Current Project Only button
-
Click on Show All Projects to display all the jobs that are available in the current working directory, not just the jobs from the current project. After clicking on Show All Projects, the button changes to Show Current Projects Only. You can click on this to revert back to displaying the jobs in the current project. If the Show All Projects button is displayed, the jobs listed in the Job Status table are jobs in the current project. If the Show Current Project Only button is displayed, the jobs listed in the Job Status table are all jobs from the current working directory.
-
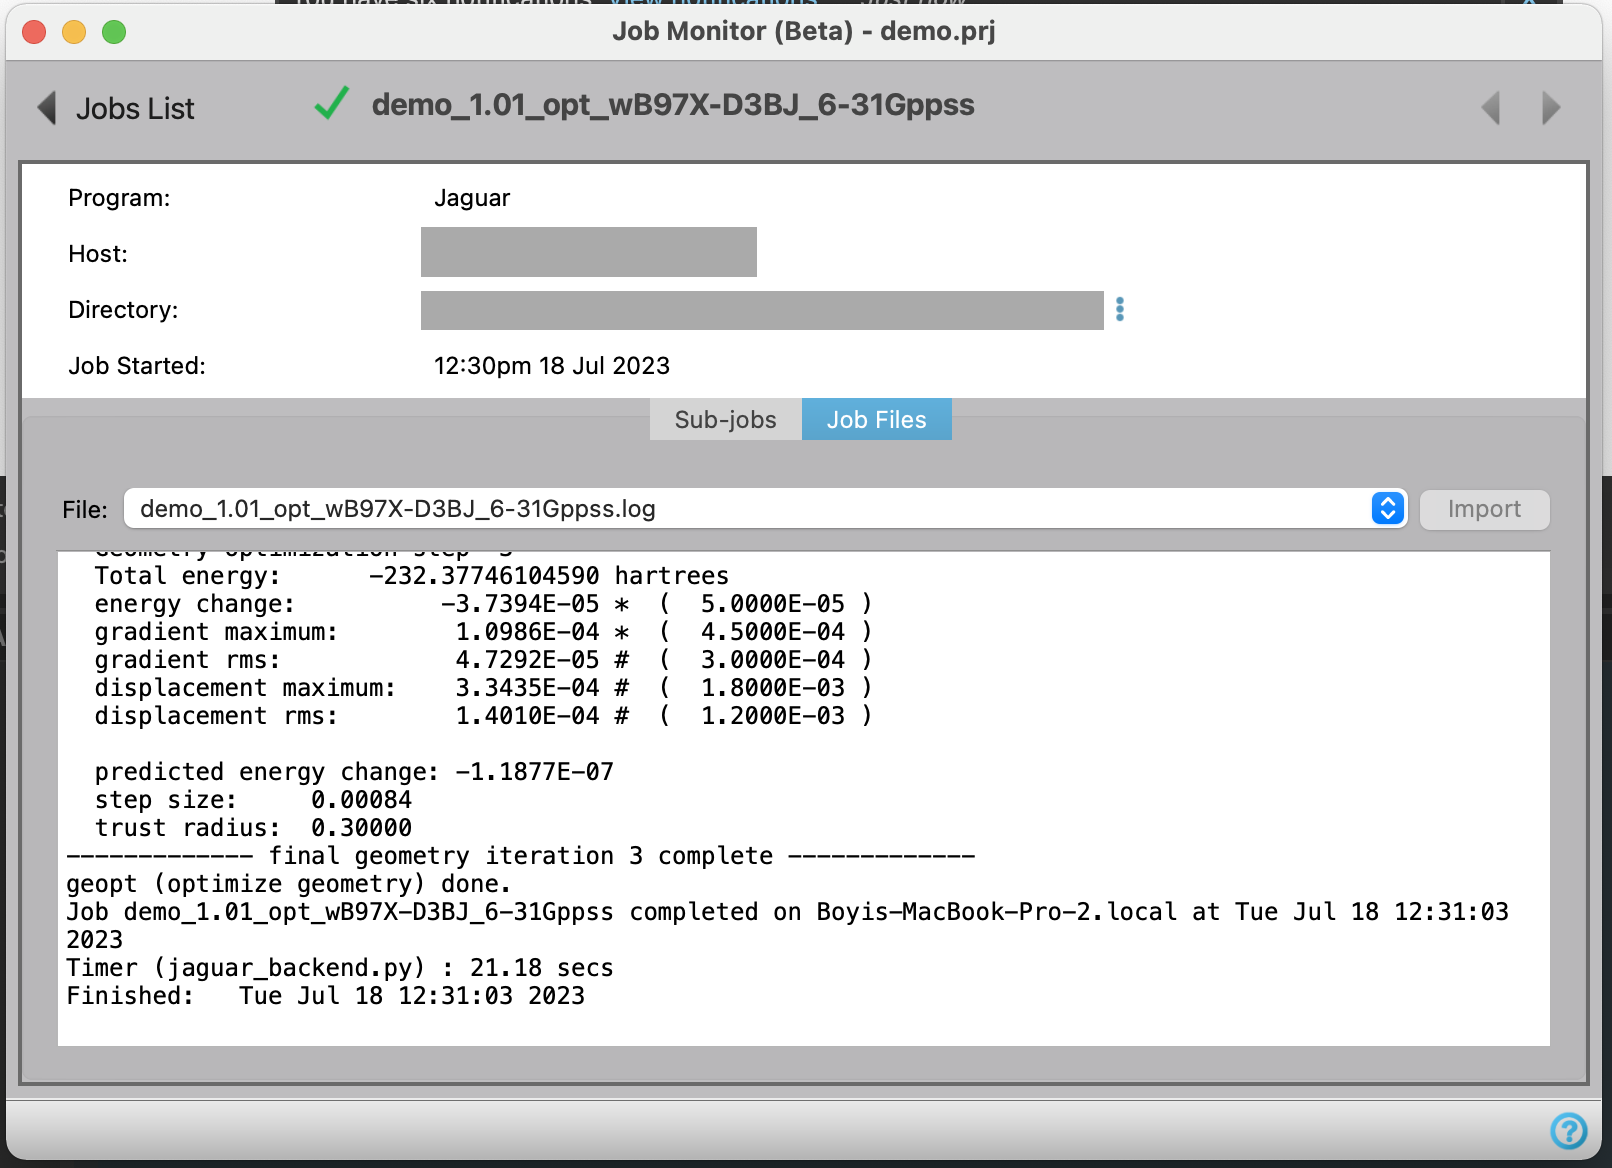
Job Details panel
-
This panel displays additional information about a job. You can view various files associated with the job and incorporate structures into the Workspace. You can also monitor the status of subjobs.
- Jobs List button
-
Click to go back to the Jobs List panel.
- Forward and backward buttons
-
Click to navigate through the jobs listed in the Job Status table in the Job List panel. The title of the job is displayed at the center of the panel and a status indicator is shown to the left of the job title.
- Job information section
-
Displays the following information about the job:
- Program—The Schrödinger application or product used to run job.
- Host—Name of host job is run on. This is set in the Job Settings Dialog Box.
- Directory—The directory where files from the job are located. Click on the three vertical dots to copy the text of the directory (Copy Text) or open the directory on your computer (View File in Browser).
- Job Started—The time and date when the job was started.
- Sub-jobs tab
-
View the status of the subjobs which are created by a parent job. The columns and actions of the Job Status table for subjobs is the same as the main Job Status table. If there are no subjobs for the parent job, the tab is empty. Double-clicking on a subjob opens up its own Job Details panel.
- Job Files tab
-
The option menu and button are not available if the file directory for the job is no longer available.