2D Sketcher Panel
In this panel you can create or modify a molecule in 2D, save it as a project entry, and save an image of the molecule.
To open this panel, do one of the following:
- Click the Tasks button and browse to Ligand Preparation and Library Design → 2D Sketcher
- In the Maestro main window, choose Edit → 2D Sketcher
- Using
- Features
- Additional Resources
Using the 2D Sketcher Panel
Quick Reference Sheet

Getting Started
-
If there is no structure included in the Maestro Workspace, the 2D Sketcher will open in Draw mode.
-
If there is a ligand included in the Maestro Workspace it will be shown in the 2D Sketcher. Including a different entry from the Entry List will change to that ligand in the 2D Sketcher by default.
-
If you include a protein-ligand complex in the Maestro Workspace, the 2D Sketcher will be disabled in the Edit Menu. If the 2D Sketcher is open, the Ligand Interaction Diagram Panel is displayed instead. To switch back to the 2D Sketcher, exclude the protein from the Workspace.
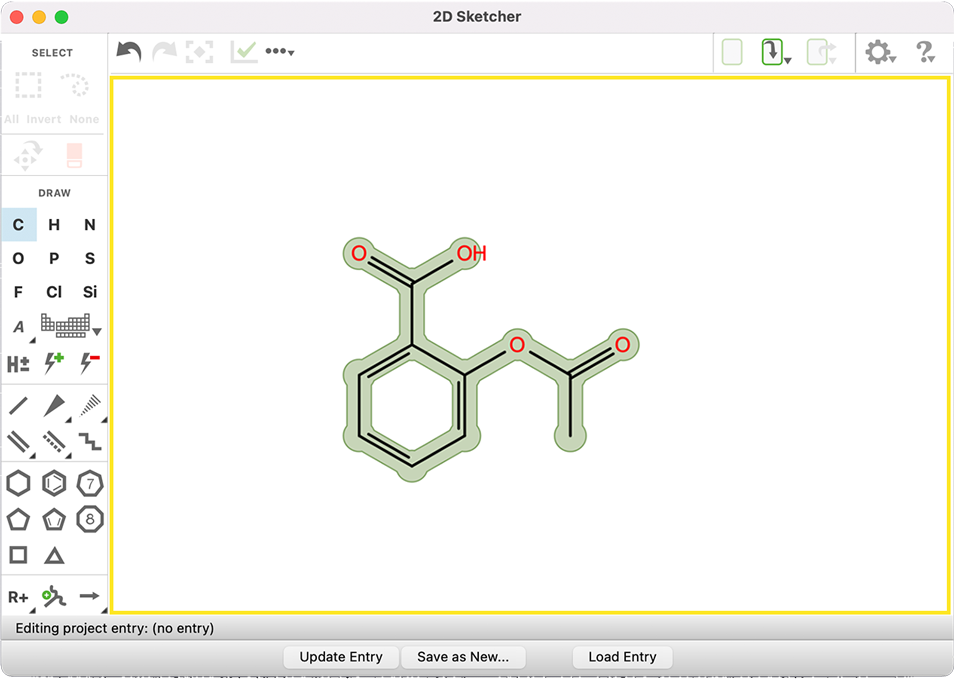
The drawing area shows the structure and is used to build or edit structures. You can pan the view with the right mouse button, and rotate it with the middle mouse button. You can zoom in and out with the mouse wheel, and you can scroll the drawing area with the scroll bars. The area is large, so it is possible to place a number of structures in it.
Drawing a New Structure
If the drawing area is empty, the Draw tools will be active.
Drawing creates a carbon-atom framework. You can change the element with the element buttons, either during drawing or after you have finished drawing.
To start a new structure, you can use:
The C Element tool. Click on the background of the drawing area to add a CH4, or click and drag briefly to add two bonded carbons. Subsequent clicks with the same tool on one of the existing carbons will add another bonded carbon. The bond is placed in a default orientation with respect to existing bonds. Clicking directly on an existing bond will increase the bond order (up to three, after which it will return to one).
Other Element tools may be used similarly. Click an existing atom with a different Element tool to change the element. Click and drag away from an existing atom to add a bonded atom with the active element. Element tools may also be used to draw bonds between existing atoms.
The Single Bond or Bond Chain tool. Click and drag on the background of the Drawing area with the Single Bond tool to add a pair of bonded carbons, then click on one of the carbons to add another bond. Alternatively, click the Bond Chain tool and then press and drag on the drawing area to draw a series of bonds. The small number at the end of the chain indicates the number of bonds that will be added when you release the mouse button. Use other bond tools to modify the single bonds, or simply right-click the bond itself and choose a different option from the popup menu.
A Ring tool. Click on a ring in the Fragments palette and then click in the drawing area to place the ring. Add bonded atoms or change elements on the ring as described above.
When editing an existing atom or bond, or adding a new bond to an atom, look for the pale green highlight on the atom or bond before clicking. This highlight moves as you move the pointer over the structure.
Editing an Existing Structure
When there is a drawing in Drawing Area, the Edit tools will be active.
Features
Using the 2D Sketcher you can draw a new structure or edit an existing one.
Click on the text bubbles in the image below to jump to that section of the documentation.
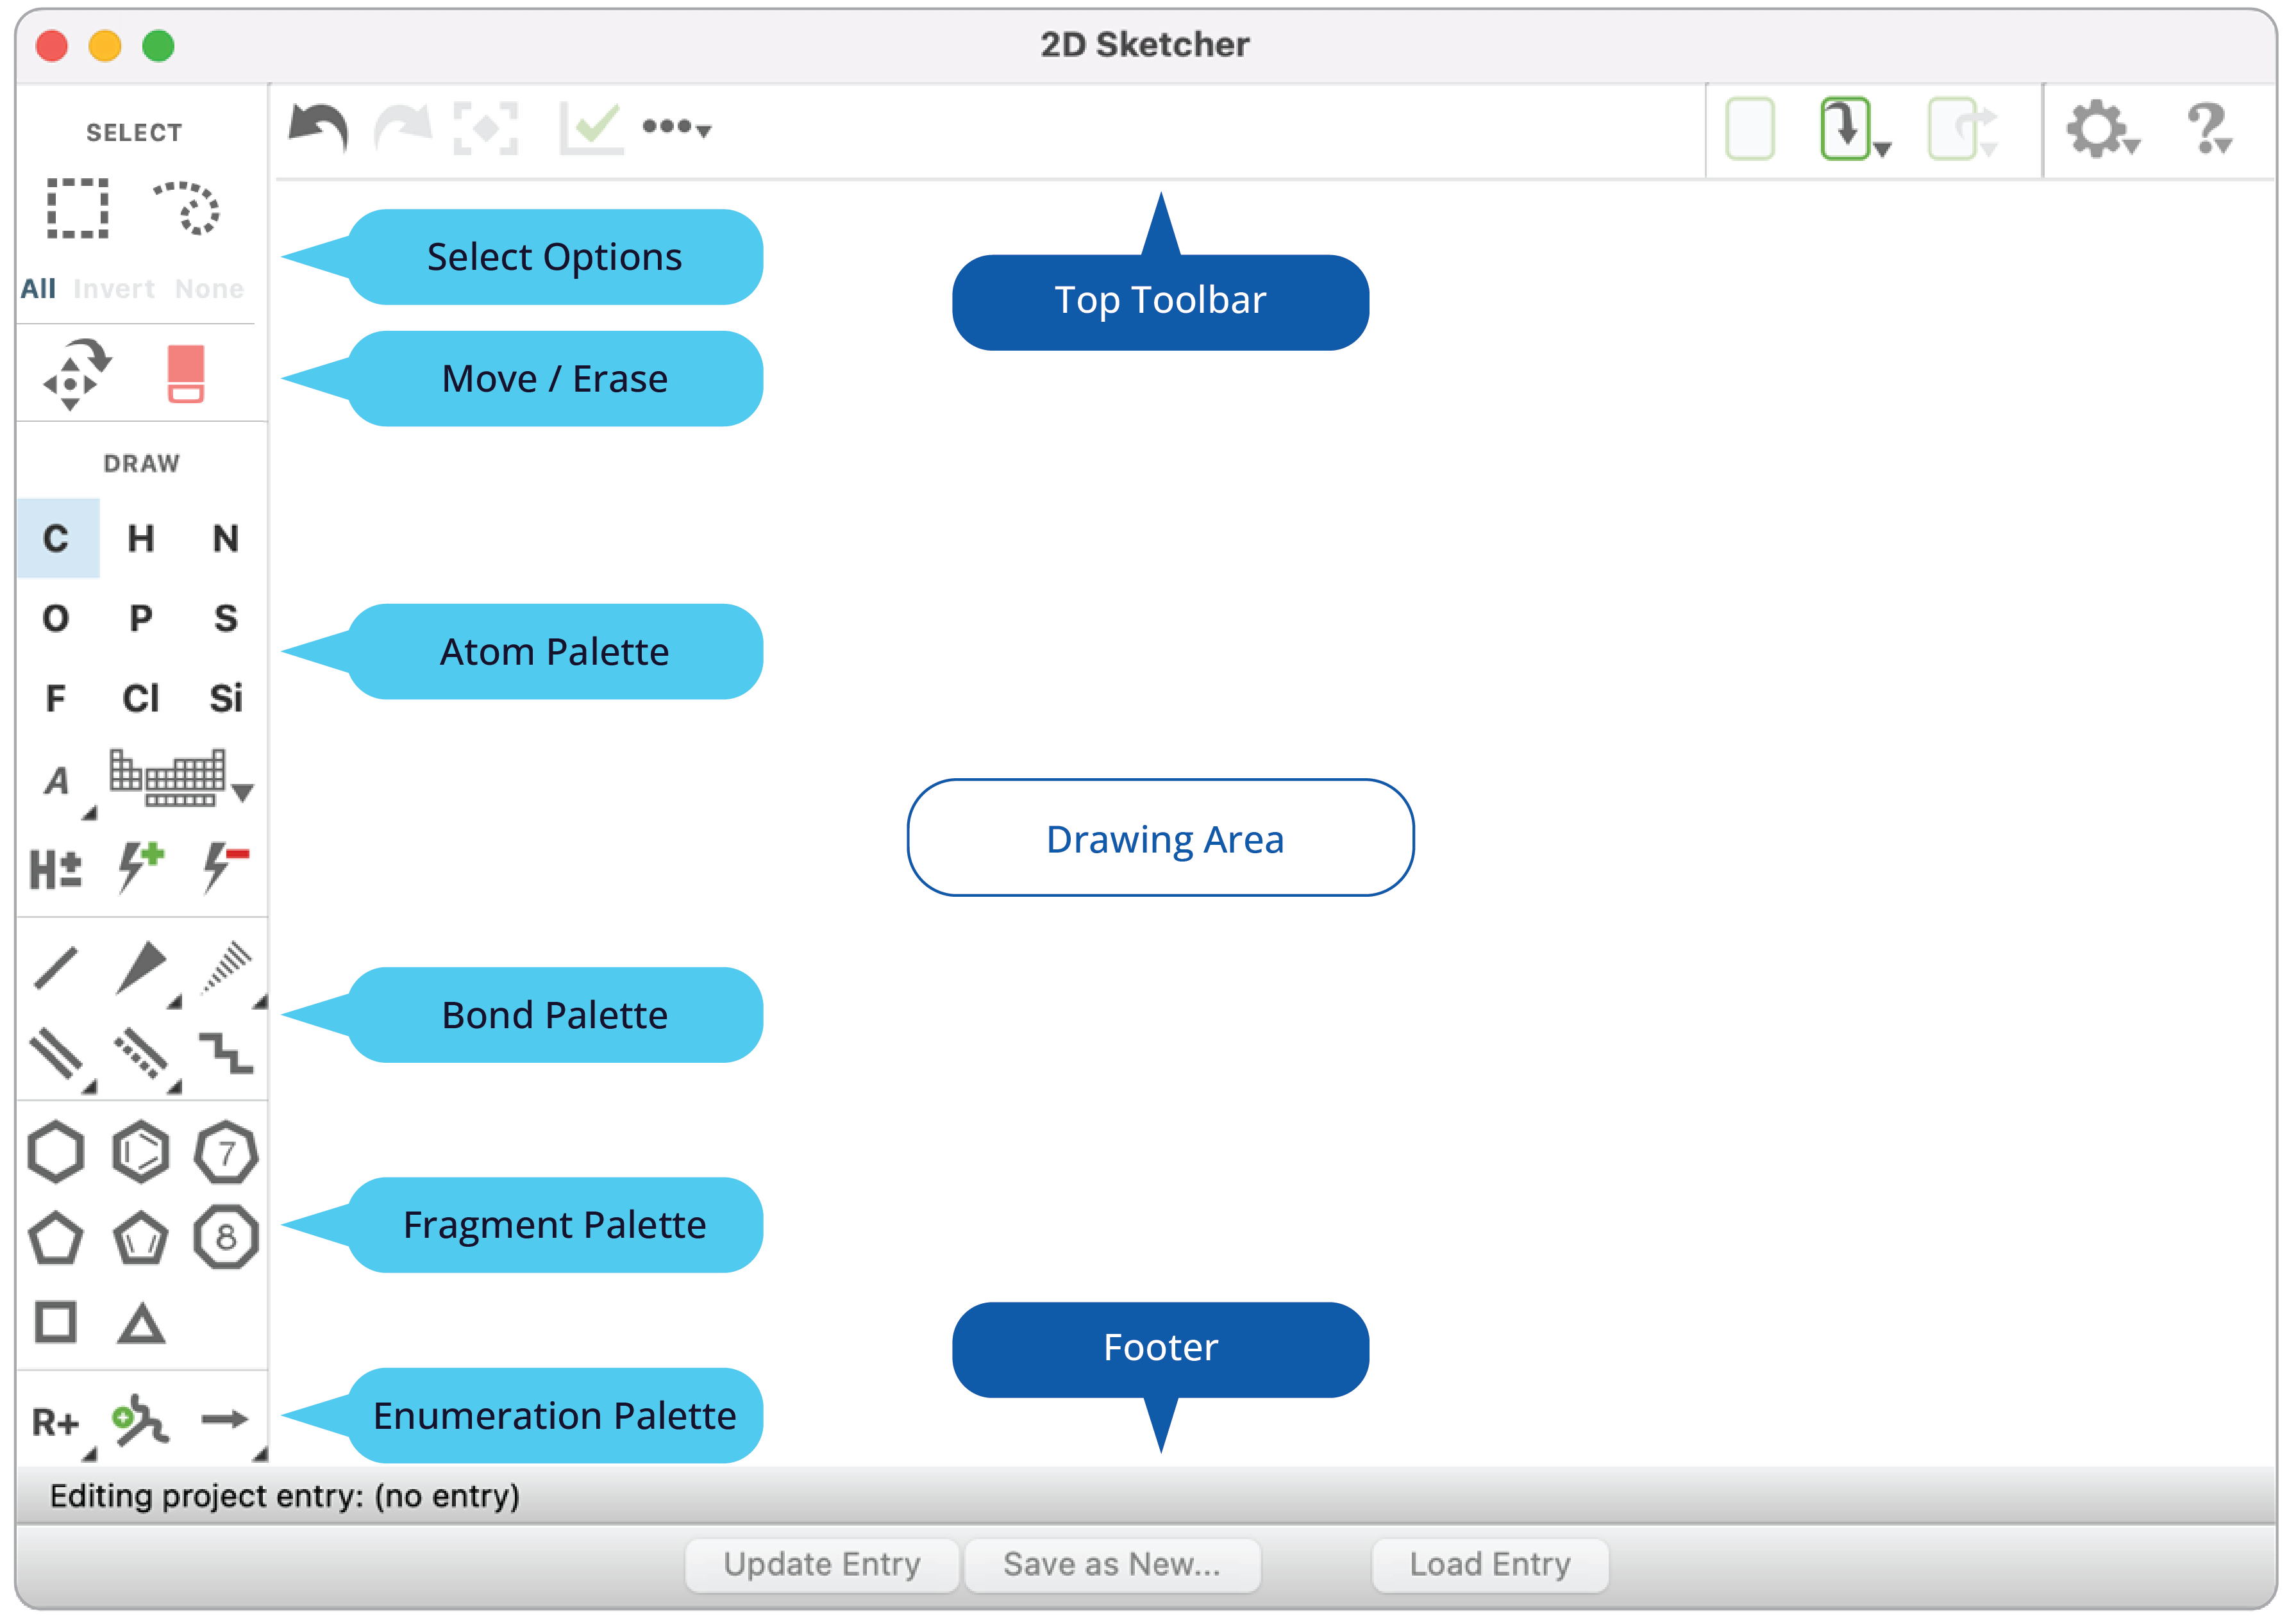
Top Toolbar
The top toolbar controls the primary functions of the 2D Sketcher.
The top toolbar includes the Edit section, the File section, Settings, and Help.


| File Tools | |
|
|
Clear Sketcher
Clear the drawing area completely. |

|
Import
Menu items: Import from File, Paste in Text, Replace Current Content (option). |

|
Export
Menu items: Save Image, Export to File. |
| Settings | |

|
Settings
Toggles: Heteroatom Colors, Stereocenter Labels |
| Help | |

|
Help
Help, About 2D Sketcher |
Sidebar
Select Options
To activate the Select Marquee Tool press the spacebar on your keyboard or click it with your mouse. Click individual atoms and bonds or drag to select a broader region of the structure.
To move the structure, click on the structure or selection and drag with the right button on your mouse or select the Move Tool in the sidebar. To rotate the structure, use the mouse scrollwheel or can be used to translate or rotate the structure or a selected region by dragging with the left mouse button; this is especially useful for users who lack the middle and right mouse buttons. The tools on the second row of this palette are enabled only when there is an active selection. A selected item or region may be moved, rotated, deleted, copied, or otherwise edited.
NOTE: When there is no structure in the 2D Sketcher, Draw is the only available mode. Selection tools do not enable in Draw or Erase modes.
| Select | ||

|

|
Select Marquee
When you bring up the 2D Sketcher and enter Select mode, the Select Marquee tool is active by default. This tool draws a square selection marquee when you click and drag across the structure. Click and hold the Select Tool button to choose between the Select Marquee Tool and the Lasso tool. |

|
Lasso
This tool allows you to draw a free-form shape (“lasso”) to select portions of the structure. You can also click atoms and bonds to select them, just like with the Select Marquee. |
|
| All | All (Select All)
Allows you to select everything in the Drawing Area. |
|
| Invert | Invert (Invert Selection)
Allows you to invert selection even when the Move tool is loaded; equivalent to clicking the background of the drawing area while using the Select tool. |
|
| None | None (Clear Selection)
Allows you to clear selection even when the Move tool is loaded; equivalent to clicking the background of the drawing area while using the Select tool. |
|
Move (Translate) and Erase

|
Move (Translate)
When the Move Tool is active, the Rotate Wand will appear. |
 Click into the circle on the wand’s handle and drag the mouse to rotate the selection (or the structure, if nothing is selected). The angle through which the structure has been rotated is displayed near the center of rotation while you are rotating it. If rotation does not seem to be working properly, check whether you have other structures in the drawing area that are not visible. You can also rotate the structure or selection without the tool at any time by dragging with the middle mouse button.

|
Erase
|
Atom palette
| ATOM PALETTE | |
|
|
Common Elements |
|
The first section of Edit Actions / Draw tools shows common elements that you can add to your sketch:[C] Carbon, [H] Hydrogen, [N] Nitrogen, [O] Oxygen, [P] Phosphorus, [S] Sulfur, [F] Fluorine, [Cl] Chlorine, and [Si] Silicon.
|
|
|
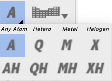
Wildcards |
|
These tools act like Element tools, but they draw atom wildcards instead of specific atoms. The default is [A] Any Heavy Atom. Click and hold to select a different wild card: [Q] Any Heteroatom, [M] Any Metal, [X] Any Halogen, and [AH] Any Atom, [QH] Any Heteroatom or H, [MH] Any Metal or H, [XH] Any Halogen or H.
|
|

|
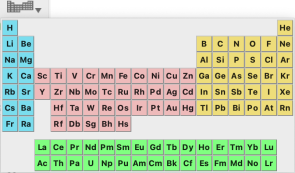
Periodic Table
The Periodic Table button allows you to select one of the less common elements. The last-selected element will appear in the Common Element palette as the final button, so that it may be used again without returning to the Periodic Table. |

|
|

|
Add or Remove Explicit Hydrogen Add Hydrogens or Remove Hydrogens on click by selection or one by one. |

|
Increase Charge Increase the formal charge on an atom by 1. |

|
Decrease Charge Decrease the formal charge on an atom by 1. |
Bond palette
Bonds
Draw individual bonds, including aromatic or query bonds or bonds with a particular stereochemistry. To draw a bond, click on (or drag from) an existing atom, or click and drag along the background of the drawing area. Click to an existing bond to change it.
Clicking a Wedge, Dashed, or Coordinate bond with the same tool will change its direction. Use the Bond Chain tool to draw a series of single bonds.
NOTE: For stereochemistry to be detected, you must have the dashed and wedged bonds adjacent, not opposite on another.
 |
Single Bond
Draw a single bond. Click on an atom to draw a bond to a new (carbon) atom, or click and drag from one atom to another to add a bond between the two existing atoms. |

|
Single Up Bond (Wedge Bond)
Draw a wedge bond. Clicking on an atom draws a wedge bond to a new (carbon) atom; clicking on a single bond converts it to a wedge bond. Click and hold to choose between other cis/trans bonds (Up, Down, Single Up or Down, Double Cis or Trans). |

|
Single Down Bond (Dashed Bond)
Draw a dashed bond. Clicking on an atom draws a dashed bond to a new (carbon) atom; clicking on a single bond converts it to a dashed bond. Click and hold to choose between other cis/trans bonds (Up, Down, Single Up or Down, Double Cis or Trans). |

|
Double Bond
Draw a double bond. Clicking on an atom draws a double bond to a new (carbon atom); clicking on a single bond converts it to a double bond. Click and hold for other bond orders (double bond, triple bond, and coordinate or zero-order bond). |

|
AromaticBond
Click on a single or double bond to convert it to an aromatic bond. Click and hold for query and other variable bonds (Aromatic, Any, [S/D] Single/Double, [S/A] Single/Aromatic, [D/A] Double/Aromatic, ). |

|
Bond Chain |


Fragments Palette
To add rings to your system, click on one of the ring buttons, then click in the drawing area. When you move the pointer into the drawing area, the ring is shown in blue. As you move the pointer in the drawing area, the ring "snaps" to positions that show a potential attachment of the ring to the structure. Clicking when the ring is in one of these positions places the ring at that position, and its color changes to black.
| Rings
|
|


 |
Cyclohexane, Benzene, Cycloheptane |


 |
Cyclopentane, Cyclopentadiene, Cyclooctane |

 |
Cyclobutane, Cyclopropane. |
Fragments Palette: Rings and Enumerations
| Enumeration
|
|

|
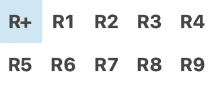
New R Group
Replaces an atom with a new R-Group labeled with the next available index. To add the new R-Group to the structure instead, click an atom and drag (in Draw mode only); this adds a bonded R-Group. |
|
Existing R Group(menu) Contains each of the currently in-use R-Groups, allowing you to label more than one center with the same R-Group label. Select the desired R-Group, then click an atom or an existing R-Group to modify it, or press and drag to add a bonded R-Group with that label. |

|
Attachment Point
Used for creating reactants; adds a property to the clicked atom indicating that this atom can be used as the attachment point. In the drawing area, an attachment point decoration is added to the atom. (Use the Eraser to remove this decoration and the corresponding atom property). |
|
|
Reaction Arrow |

|
Reaction Step
Add reaction step. Used for sketching reactions. Adds a single reaction step, placing a Reaction Arrow in the drawing area. If two or more structures are added on either side of the arrow, a Reaction Plus is automatically added between them. NOTE: Multi-step reactions cannot be copied or exported to a file. |

|
Map Atoms
Optional step when sketching reactions. Allows you to manually map atoms in the reactants to the corresponding atoms in the product. Requires dragging from the atom in the reactant to the corresponding atom in the product; when you release the mouse, a small number will appear in brackets on both atoms, indicating their relationship. |

|
Delete Mapping
Click mapped atom to remove mapping. |
Footer
- Update Entry button
-
Click this button to save changes to the project entry that is currently being edited; it will be updated with the structure shown in the drawing area. The title of the entry is displayed in the satus region above the button bar ("Editing project entry.").
- Save as New button
-
Click this button to create a new project entry from the structure in the drawing area. A small dialog opens, prompting for an entry title; enter the title and click OK. The structure is converted to 3D, and hydrogens are added to the structure when the entry is created.
- Revert Entry button
-
This button is available when an existing Maestro entry is being edited and changes have been made since the last save or update. Click this button to discard changes and reload the entry into the 2D Sketcher.
- Load Entry button
-
This button is available when the structure in the 2D Sketcher is not associated with an existing Maestro entry, but an appropriate small molecule entry is currently in the 3D Workspace. Click this button to discard the contents of the 2D Sketcher (if any) and load the Workspace entry into the Sketcher.