Run Meta Workflow Panel
Apply built-in and previously saved meta workflows to systems of interest.
To open this panel: click the Tasks button and browse to Materials → Tools → Meta Workflows → Run Meta Workflow .
The following licenses are required to use this panel: MS Maestro, additional licenses are workflow dependent
- Using
- Features
- Additional Resources
Using the Run Meta Workflow Panel
This panel allows you quickly apply existing workflows to your system. Select a workflow from the Workflow list on the left. You can use the Filter text box to search for workflows. The Workflow list contains built-in single stage workflows that are included by default, as well as any workflows you have created and saved from the Meta Workflow Builder Panel.
When the meta workflow job is run, each stage is submitted to the queueing system for execution in the proper sequence. Stages which have a parent stage or other required stages do not run until the parent or required stages have successfully completed. Stages which do not depend on results from another stage are simultaneously submitted to the queue and continue to run even if another stage has failed. Certain stages can be submitted to both CPU or GPU hosts, while other require a Linux GPU host. You can specify hosts for the meta workflow stages as well as the meta workflow driver from the Run Meta Workflow - Job Settings Dialog Box.
To write out the input file and a script for running the job from the command line, click the arrow next to the Settings button  and choose Write.
Run Meta Workflow Panel Features
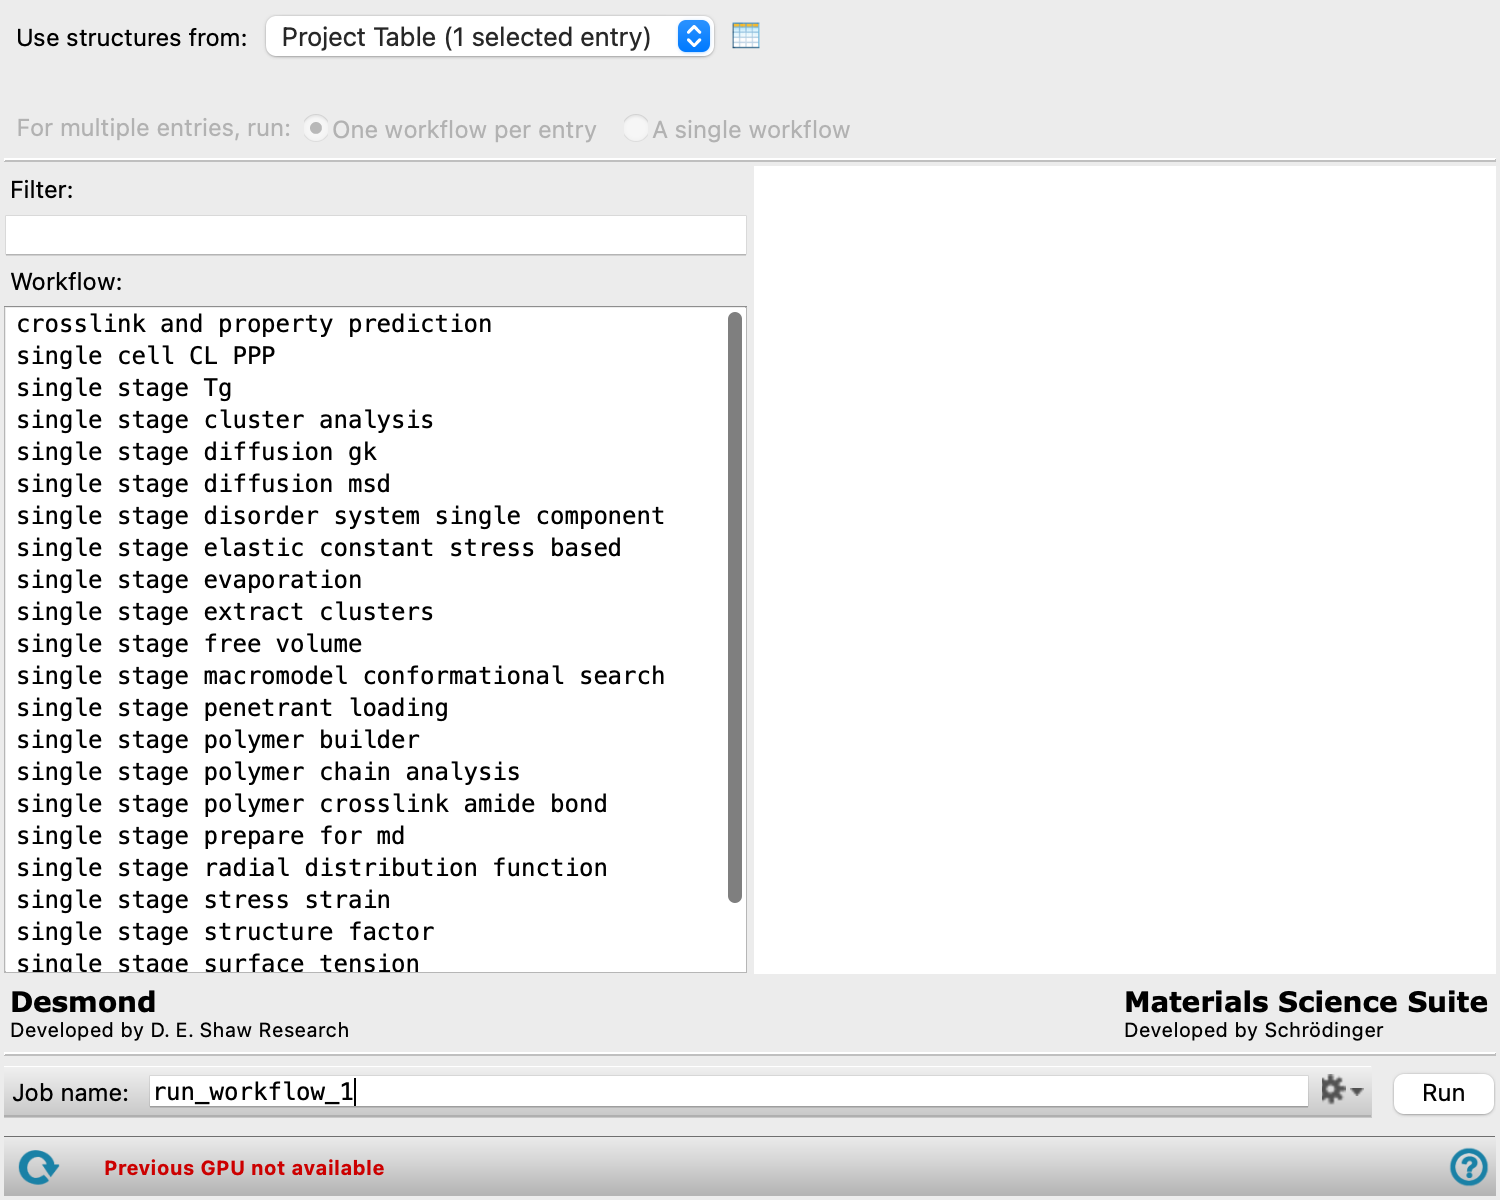
- Use structures from option menu
-
Choose the structure source for the current task.
- Project Table (n selected entries)—Use the entries that are currently selected in the Project Table or Entry List. The number of entries selected is shown on the menu item.
- Workspace (included entries)—Use the entries that are currently included in the Workspace, treated as separate structures.
- File—Use the specified file. When this option is selected, the File name text box and Browse button are displayed.
- Project Table (n selected entries)—Use the entries that are currently selected in the Project Table or Entry List. The number of entries selected is shown on the menu item.
- Open Project Table button
-
Open the Project Table panel, so you can

- File name text box and Browse button
-
Enter the file name in this text box, or click Browse and navigate to the file. The name of the file you selected is displayed in the text box.
- For multiple entries, run options
-
You can choose to run separate meta workflows for each selected entry or run a single meta workflow on a selection of multiple structures.
Only available if multiple entries are selected in the Use structures from option menu.
-
One workflow per entry— For each selected entry, the meta workflow is independently run.
-
A single workflow—The selected entries are combined and run in a single workflow. This option is only possible if the first step of the meta workflow can combine multiple structures (e.g., Disordered Systems Builder, Polymer Builder). Otherwise, an error is thrown when you click Run.
-
- Filter text box
-
Type in this box to filter the Workflow list to match the text you type. The box searches the workflow metadata (Description, Tags, Creator) in addition to the workflow names in the list.
- Workflow list
-
Lists the single stage workflows that are included by default, as well as any workflows you have saved from the Meta Workflow Builder Panel. If you select the latter, text appears at the bottom of the list showing the workflow metadata.
- Workflow diagram
-
The Workflow diagram provides a graphical representation of the meta workflow.
Each stage in the workflow is represented by a circle. The label inside each circle indicates the name of the stage. Parent and child stages are connected by arrow (→) from the parent stage to the child stage. If a stage produces multiple output structures which launch duplicate workflows, it is indicated by triple arrows. A stage which requires other stages are connected to them by a dotted line (---). A stage which generates multiple output structures and launches duplicate workflows on those structures is indicated by multiple arrows (⇛) flowing from the stage.
The colors of the circles indicate the type of stage:
- Tan (
■
)—The stage uses a structure builder. - Cyan (
■
)—The stage runs a molecular dynamics simulation. - Green (
■
)—The stage runs a quantum mechanics calculation. - Gold (
■
)—The stage uses a custom script. - Gray (
■
)—The stage is a Flow control stage. - Magenta (
■
)—Other. For example, a stage which involves trajectory analysis is magenta.
- Tan (
- Job toolbar
-
Manage job submission and settings. See Job Toolbar for a description of this toolbar.
The Job Settings button opens the Meta Workflow Builder - Job Settings Dialog Box, where you can make settings for running the job.
- Status bar
-
 to reset the panel to its default settings and clear any data from the panel.
If you can submit a job from the panel, the status bar displays information about the current job settings and status for the panel. The settings include the job name, task name and task settings (if any), number of subjobs (if any) and the host name and job incorporation setting. The job status can include messages about job start, job completion and incorporation.
The status bar also contains the Help button
 , which opens an option menu with choices to open the help topic for the panel (Documentation), launch Maestro Assistant, or if available, choose from an option menu of Tutorials. If the panel is used by one or more tutorials, hover over the Tutorials option to display a list of tutorials. Choosing a tutorial opens the tutorial topic.