Define Groups by SMARTS Panel
Define a set of atom groups by SMARTS patterns for coarse_grained modeling, and run a job to locate and label the atom groups in a set of structures.
To open this panel, click the Tasks button and browse to Materials → Classical Mechanics → Coarse Grain Models → Define Groups by SMARTS.
The following licenses are required to use this panel: MS Maestro
- Using
- Features
- Additional Resources
Using the Define Groups by SMARTS Panel
The main purpose of this panel is to define groups of atoms that can then be used to define particles for coarse-grained modeling. The job searches each structure for matches to the SMARTS pattern for each group, in turn, and labels the atoms with an atom property that identifies its membership in a group. The search is done in the order in which the groups are defined in this panel. Atoms that match the SMARTS pattern for one group are eliminated from the search for the next group, so an atom can only belong to one group. The output of the job can be loaded into the Map Atoms to Particles Panel, where the groups are listed as potential particle types.
Care needs to be exercised in dividing up a molecule for SMARTS matching: in some cases it may be necessary to add chiral specifications or include recursive qualifiers for atoms in the SMARTS patterns to get a unique match.
A job to define groups can take minutes to run for large systems.
To write out the input file and a script for running the job from the command line, click the arrow next to the Settings button  and choose Write.
SMARTS patterns may need refinement to ensure that they match the desired atoms. When the job finishes, you should examine the log file (e.g. in the Monitor Panel), to check the number of matches. SMARTS patterns that need refinement will often have no matches.
Define Groups by SMARTS Panel Features
- Use structures from option menu
-
Choose the structure source for the current task.
- Project Table (n selected entries)—Use the entries that are currently selected in the Project Table or Entry List. The number of entries selected is shown on the menu item.
- Workspace (n included entries)—Use the entries that are currently included in the Workspace, treated as separate structures. The number of entries in the Workspace is shown on the menu item.
- File—Use the specified file. When this option is selected, the File name text box and Browse button are displayed.
- Project Table (n selected entries)—Use the entries that are currently selected in the Project Table or Entry List. The number of entries selected is shown on the menu item.
- Open Project Table button
-
Open the Project Table panel, so you can

- File name text box and Browse button
-
Enter the file name in this text box, or click Browse and navigate to the file. The name of the file you selected is displayed in the text box.
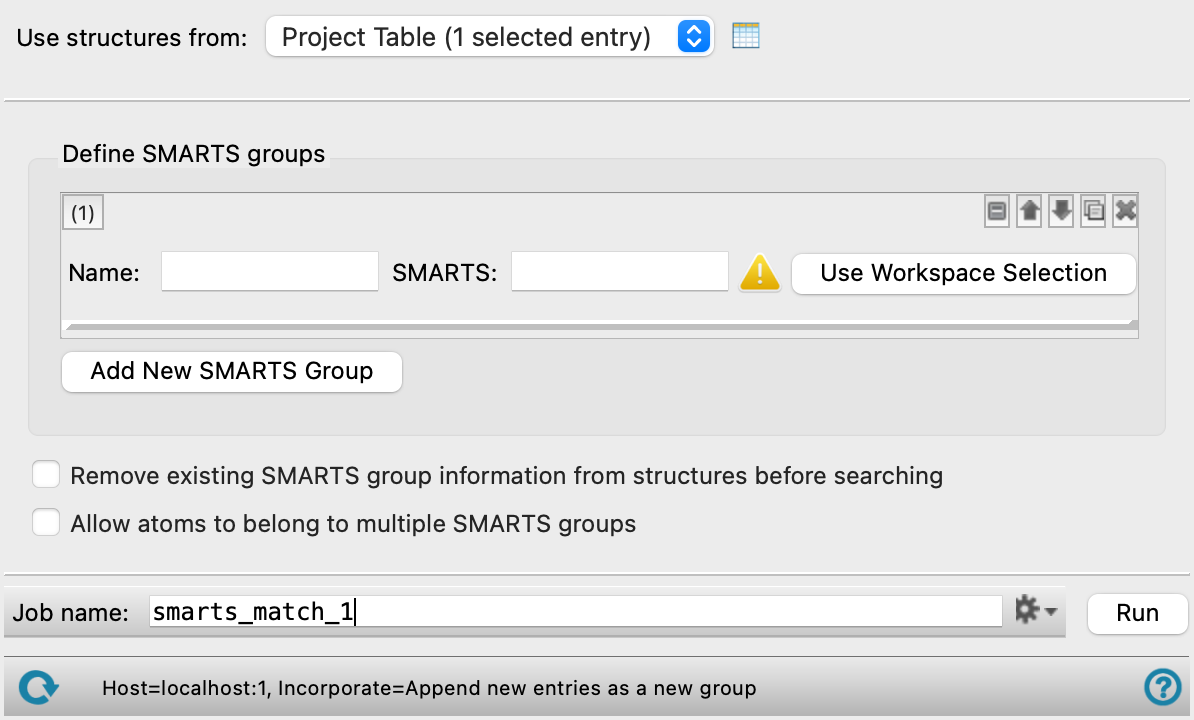
- Define SMARTS groups section
-
In this section you define the SMARTS patterns for each group. The main body of this section consists of a set of controls for each group. Initially there is only one group present. The order of the groups matters: the search is done in the order they appear in this section, and any atoms that match a group are ignored in searches for matches in the next group.
- SMARTS group definition
-
Define the SMARTS pattern for the group.
- Action buttons
-
These buttons perform various operations on the group. They allow for easy duplication, display, and removal of groups.


Show or hide the controls. This is useful when you have a number of groups and want to compare two separated groups, for example. 

Move the group up or down in the list. This allows you to change the order of matching of the groups. 
Duplicate the group. This is useful for creating similar groups with variations on the SMARTS pattern. 
Delete the group. - Name text box
-
Enter the name for the group. This name is used to identify the group and to label the atoms that belong to the group. It is also used in the Map Atoms to Particles Panel when you load the results, to define a particle for coarse-grained modeling.
If you plan to use the Martini force field with groups defined here, you should use the Martini site type name in this text box. See Site Types for Martini for more information.
- SMARTS text box
-
The SMARTS pattern that defines the group. You can enter a SMARTS pattern into the text box by typing or pasting, and you can edit the pattern once it is entered.
- Use Workspace Selection button
-
Define the SMARTS pattern by analyzing the Workspace selection. Select the atoms in the Workspace first, then click this button. A SMARTS pattern for the selected atoms is entered in the text box, overwriting any existing pattern. You can then edit the pattern if you want.
- Add New SMARTS Group button
-
Add a set of controls for a new SMARTS group.
- Remove existing SMARTS group information from structures before searching option
-
Remove any existing labeling of atoms by SMARTS groups in the structures before searching for the current set of groups. If there are existing labels, the labeled atoms are ignored in searches for matches to the SMARTS patterns. This option allows you to clear the labels so that searches can match any atoms.
- Allow atoms to belong to multiple SMARTS groups option
-
This option relaxes the restriction that each atom must be in a separate group, which allows more flexibility in designing groups for coarse-grained particles that have the desired properties or behavior, or permit the shape of the molecule as a whole to be more closely imitated.
- Job toolbar
-
Manage job submission and settings. See Job Toolbar for a description of this toolbar.
The Job Settings button opens the Define Groups by SMARTS - Job Settings Dialog Box, where you can make settings for running the job.
- Status bar
-
The status bar displays information about the current job settings and status for the panel. The settings includes the job name, task name and task settings (if any), number of subjobs (if any) and the host name and job incorporation setting. The job status can include messages about job start, job completion and incorporation.
Use the Reset button
 to reset the panel to its default settings and clear any data from the panel.
 The status bar also contains the Help button
 , which opens the help topic for the panel in your browser. If the panel is used by one or more tutorials, hovering over the Help button displays a
  button, which you can click to display a list of tutorials (or you can right-click the Help button instead). Choosing a tutorial opens the tutorial topic.