Map Atoms to Particles Panel
Iteratively select groups of atoms in a structure and specify them as coarse-grained particles for molecular dynamics simulations, then generate a project entry with the coarse-grained model.
To open this panel, click the Tasks button and browse to Materials → Classical Mechanics → Coarse Grain Models → Map Atoms to Particles.
The following licenses are required to use this panel: MS Maestro, MS CG
- Using
- Features
- Additional Resources
Using the Map Atoms to Particles Panel
To build a coarse-grained model, you must first build the all-atom model, and then you can use this panel to convert it to a coarse-grained model. You can, for example, use the Polymer Builder Panel to build a structure for modeling. There are many predefined particle definitions, and you can also use the Define Groups by SMARTS Panel to define atom groups that match SMARTS patterns, which can then be used to define particles.
-
Include the desired all-atom structure in the Workspace and click Import Structure.
-
Enter a title for the coarse-grained model, to be used for the project entry.
-
(optional) Choose a color for unassigned atoms and apply it by clicking Color.
-
In the Name column of the table, choose a particle type from the option menu (if there are any), or enter the name of the particle type in the text box.
For a predefined particle type, the remainder of the columns are filled out using the definitions for that particle type.
-
Choose a definition from the option menu in the Definition column, if a new name was entered.
If you chose Use Workspace Selection, pick the atoms in the Workspace that you want to include in the particle. This defines a single particle. The definition only applies to this set of atoms, and is not applied to other sets of atoms that have the same atoms and connectivity. To do this, you must predefine particles, for example with the Define Groups by SMARTS Panel
Otherwise, all atoms in the Workspace that match the definition are defined as particles.
-
(optional) Choose a color for the atoms in the particle, by clicking the color block in the Color column.
-
Set the atom type index in the Type column, which must be a number between 301 and 400 inclusive.
-
(optional) To save the particle type for use in other models, click Save in the Save column.
-
To add another particle type, click Add Row, then repeat Steps 5-9.
-
Repeat the addition of particle types until mapping is complete..
Sometimes you might not want to map all of the atoms to particles: for example, caps on polymers, or ions when charge is represented implicitly. In these cases, the unmapped atoms are ignored.
When assigning atoms to particles, note the following limitations:
- Multiple molecules are not permitted in a single particle.
- It is not possible to represent the tacticity of residues that are topologically symmetric in a coarse-grained model (e.g. 1 backbone site with a side chain site attached).
Map Atoms to Particles Panel Features
- Import Structure button
-
Click to load the entry included in the Workspace. This structure replaces any previously loaded structures.
- Coarse-grained model title text box
-
Enter a title for the coarse-grained model project entry, which is created when you click Run.
- Atom assignment text
-
The number of atoms in the Workspace structure that are assigned to a particle and the number remaining to be assigned are reported here.
- Color unassigned atoms color box and Color button
-
Color unassigned atoms in the Workspace with the chosen color. Click the color button to choose the color in a color selector, and then click Color to color the atoms. This helps to identify the atoms that are yet to be assigned to a particle. Atoms that are subsequently assigned are then colored with the color of the particle they are assigned to.
- Allow atoms to belong to multiple particles option
-
This option relaxes the restriction that atoms must belong to only one particle. Particles can then be connected where there is an atom rather than where there is a bond, which can assist in designing particles that are symmetric where otherwise they would be asymmetric (e.g in polypropylene).
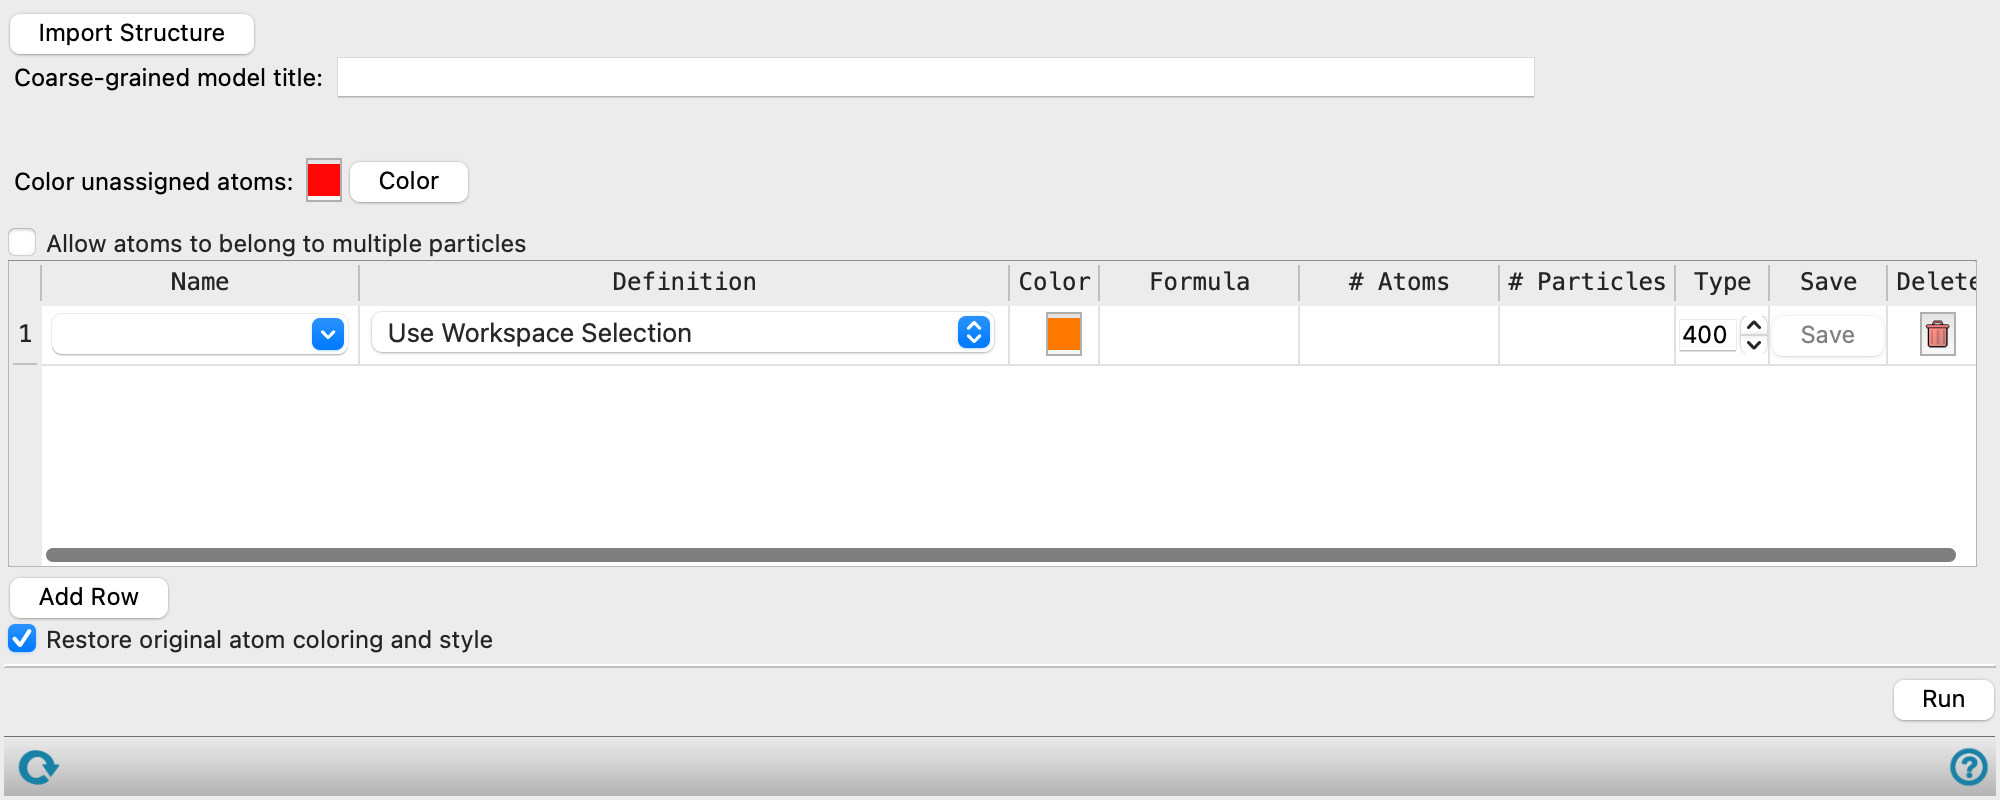
- Particle table
-
This table lists the particles and provides tools for defining particles, coloring their atoms, and performing some actions on them. The table columns and the tools in them are described below.
Name Particle name. You can change the name by editing the text field. Named (saved) particles are listed on the menu, so you can select a previously defined particle. When you do this, the remaining columns are automatically filled in, using the definition stored with the particle. Definition Choose an item from the option menu to define the particles. The menu is populated with a predefined set of particle types, and any atom groups that originate from the Define Groups by SMARTS Panel. If you choose Use Workspace Selection you must choose atoms in the Workspace first, then choose this item; this defines a single particle (it does not search for other instances). Color Color atoms of this particle in the Workspace with this color. Click the button to choose a color in the color selector that opens. The color is automatically set for each new row. Formula Empirical formula of the particle. # Atoms Number of atoms that make up this particle type (number of atoms per particle). # Particles Total number of particles of this type in the Workspace. Type Specify the (MacroModel) atom type for the particle, for use in the model. The selection is arbitrary, as the assignment is done dynamically. It is recommended to use values between 301 and 400 inclusive, starting at 400. The default value for the first row a new model is 400, and the value is decremented automatically for each new row. Save Save the particle definition as a template in your Schrödinger user resources directory. Once saved, the name of the particle is shown on the option menu in the Name column. Delete Delete the row. - Add Row button
-
Add a row to the table, to define a new particle.
- Restore original atom coloring and style option
-
As particles are defined the coloring and style of the atoms in the Workspace structure will change to reflect the particulation. Select this option to restore the original atom coloring and style of the Workspace structure after clicking the Run button.
- Run button
-
Prepare the coarse-grained model structure, add it as a project entry with the specified title, and include it in the Workspace.
- Status bar
-
 to reset the panel to its default settings and clear any data from the panel.
If you can submit a job from the panel, the status bar displays information about the current job settings and status for the panel. The settings include the job name, task name and task settings (if any), number of subjobs (if any) and the host name and job incorporation setting. The job status can include messages about job start, job completion and incorporation.
The status bar also contains the Help button
 , which opens an option menu with choices to open the help topic for the panel (Documentation), launch Maestro Assistant, or if available, choose from an option menu of Tutorials. If the panel is used by one or more tutorials, hover over the Tutorials option to display a list of tutorials. Choosing a tutorial opens the tutorial topic.