Set Barrier Potential for MD Panel
Add repulsive barriers to a system displayed in the Workspace, and save the updated system containing barrier information as a Desmond model.
To open this panel: click the Tasks button and browse to Materials → Classical Mechanics → MD Simulations → Setup Barrier Potential for MD
The following licenses are required to use this panel: MS Maestro
- Using
- Features
- Additional Resources
Using the Set Barrier Potential for MD Panel
This panel allows you to add a barrier (“wall”) to all-atom or coarse-grained systems by applying a repulsive potential of the form:

where r is the distance from the barrier to the atom or particle, rcutoff is a user-defined distance beyond which the repulsive potential is not applied, A is a user-defined Pre-factor, and n is a user-defined Exponent. The force applied to the atoms or particles within the cutoff range is:

Beyond the cutoff distance, the force is zero. A, n, and rcutoff can be adjusted in the panel to control the range and strength of the repulsive force.
You can define either an impermeable or semi-permeable barrier. An impermeable barrier applies the above force to all atoms or particles in the system, while a semi-permeable barrier only applies the force to selected atoms or particles.
You can add multiple barriers to the system using the Add Barrier button. Once barriers have been set, click Apply to save the system and incorporate it in the Workspace. You can then import the structure into the MD Multistage Workflow Panel and select the Apply potential barrier option to apply the repulsive force in molecular dynamics simulations.
A repulsive barrier may be useful in periodic structures to prevent certain types of interactions. For example, you can use a barrier to ensure molecules only interact with one side of a substrate in an adsorption or deposition process.
Set Barrier Potential for MD Panel Features
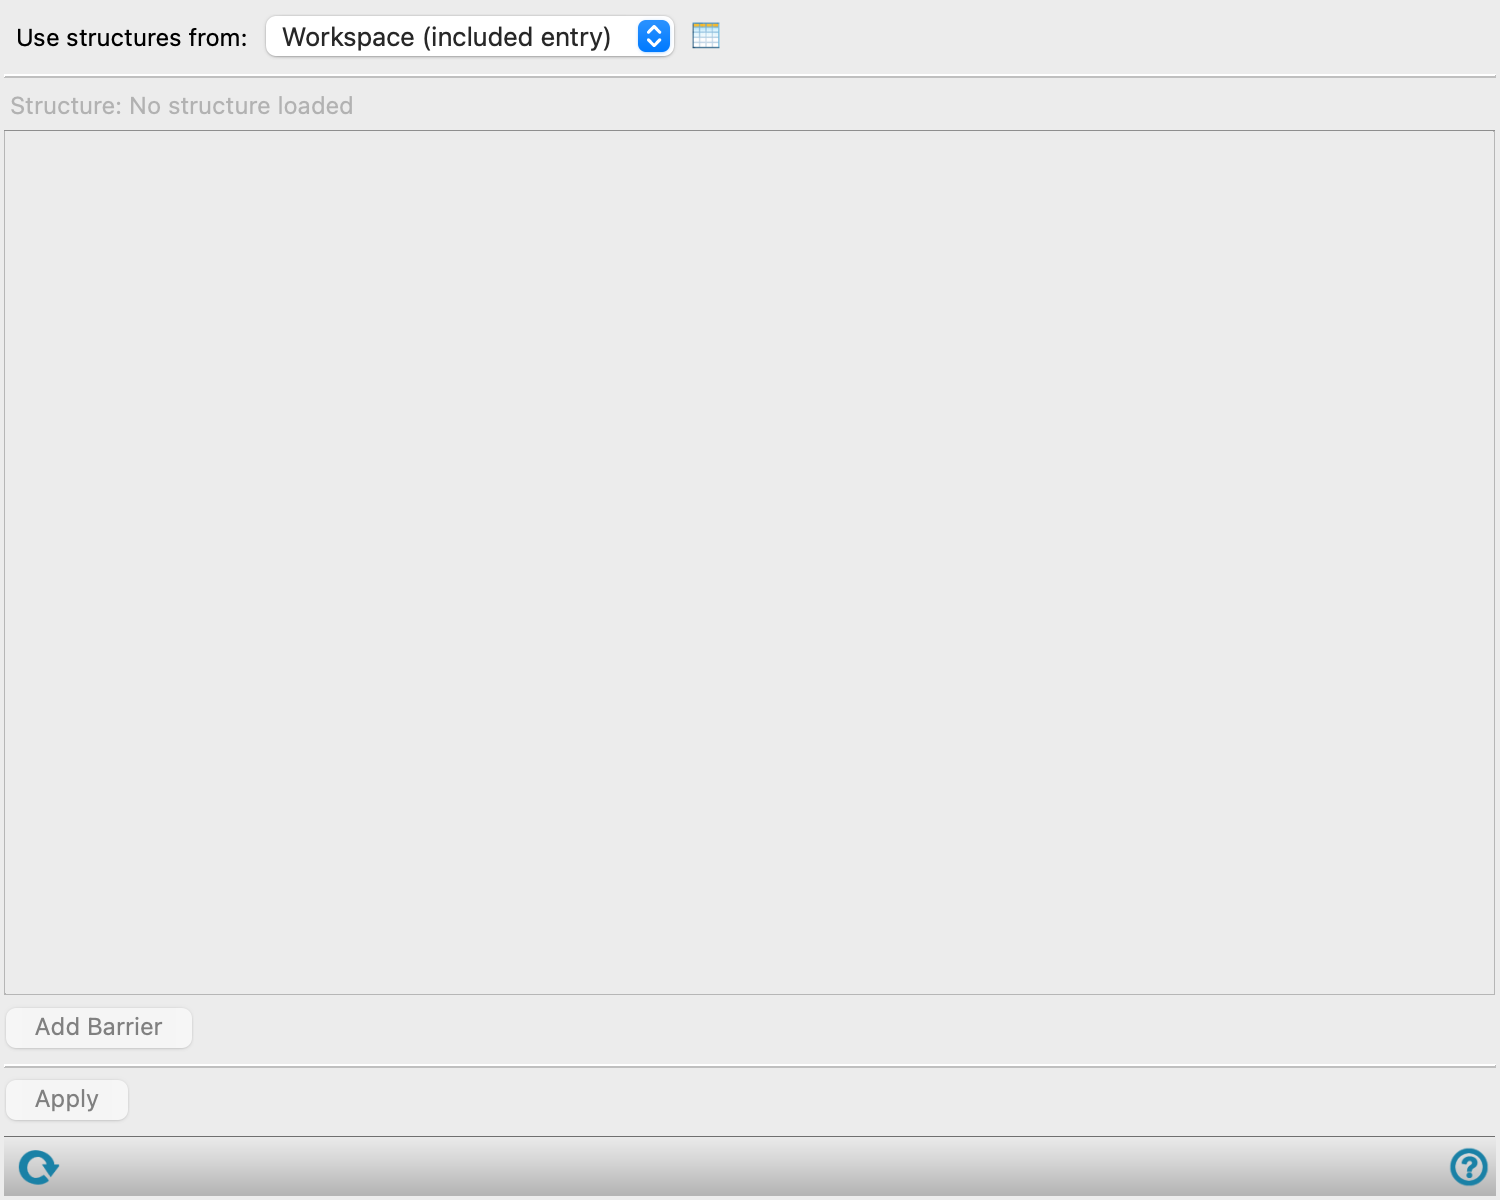
- Use structures from option menu
-
Choose the structure source for which to add barriers.
- Workspace (included entries)—Use the entries that are currently included in the Workspace, treated as separate structures.
- Open Project Table button
-
Open the Project Table panel, so you can

- Structure text
-
Display the name of the loaded structure. Noneditable.
-
If there is pre-existing barrier information associated with the structure, a noneditable stage is added for each barrier.
- Barrier selection tools
-
These tools allow you to define the type of barrier for the system, as well as its position and strength.
- barrier selection management buttons
-
These buttons perform display and ordering operations on the barrier selection. They allow for easy duplication and rearrangement of barrier selections.


Show or hide the contents of the barrier selection. When hidden, only the barrier selection number, label (if any) and these buttons are displayed. This is useful when you have a number of barrier selections and want to compare two separate barrier selections, for example. 
Duplicate the barrier selection. This is useful for creating similar barrier selections with variations on the settings. 
Delete the barrier selection. - Barrier text
-
If there is pre-existing barrier information associated with the loaded structure, the position and direction of the existing barrier is displayed. Noneditable.
- Impermeable option
-
The barrier applies to all atoms or particles in the system.
- Semi-permeable option
-
The barrier allows selected atom types through. A semi-permeable barrier applies the same repulsive force as the impermeable barrier, but only to atoms or particles selected using the Non-permeable atoms ASL picking tools. Selecting all atoms as non-permeable is the same as selecting the Impermeable option.
- Axis option menu
-
Select in what direction the repulsive barrier ("wall") should be applied, from x, y or z. You can use the Barriers option in the Workspace Configuration Toolbox to visualize this placement in the Workspace.
- Pre-factor text box
-
The constant A in the repulsive force that is applied to eligible atoms or particles, in kcal/mol. The constant must be positive, as the force would no longer be repulsive with a negative value. A larger pre-factor leads to a greater repulsive force applied.
- Cutoff Distance text box
-
Specify a distance relative to the position of the barrier beyond which the repulsive force is zero, in angstroms. It is recommended that distances be set at a point where the repulsive force is small, to avoid a sudden change in forces applied. A warning is issued if the specified repulsive force at the Cutoff Distance is more than 10 kcal/mol. The Cutoff Distance cannot be smaller than 2 angstroms.
- Exponent text box
-
The exponent n in the repulsive force that is applied to eligible atoms or particles. The exponent can only take on values of 1, 2, or 3.
- Offset text box
-
The initial space between the barrier and the atoms or particles, which cannot be smaller than 2 angstroms. The placement of the barrier is determined with the Relative position option menu. You can use the Barriers option in the Workspace Configuration Toolbox to visualize the barrier in the Workspace as you change the value in this text box.
- Relative position option menu and ASL text box
-
Place the barrier Above or Below the group of atoms or particles selected in the ASL using standard picking tools. By default, the barrier is placed 6 angstroms above the entire system. You can use the Barriers option in the Workspace Configuration Toolbox to visualize the barrier in the Workspace.
- Color button
-
Shows the color that represents the barrier in the Workspace if the Barriers option is selected in the Workspace Configuration Toolbox. Click the button to open a color selector and choose the color.
- Add Barrier button
-
Add another barrier to the system. Use the Barrier selection tools to define the new barrier.
- Apply button
-
Add all defined barriers to the included structure and save the structure as a new Desmond model. Opens a file selector, to name and save the file. The newly created structure is automatically incorporated into the Workspace.