First steps in Maestro
Learn how to set up Maestro projects, customize paths, and import structures. If you prefer to watch a video tutorial, check out our Getting Going with Maestro video series.
Understanding Maestro projects
All work in Maestro is organized into projects, which store the state of your Workspace, all Entries, and associated Project Table data. The project is stored on disk as a directory with a .prj ending, but to any non-Schrödinger program behaves like any other directory, so you can e.g. look into the project with a file manager and create or edit files therein. There are two types of projects: scratch projects and named projects.
Named projects
You can create a named project using File → New Project or by saving a scratch project using File → Save Project As. Once a project is saved as a named project, all work you do in the project is automatically saved to disk.
If you want to share a project with your colleagues, you can save it as a read-only project archive (.prjzip) file by going to File → Save Project As...
Scratch projects
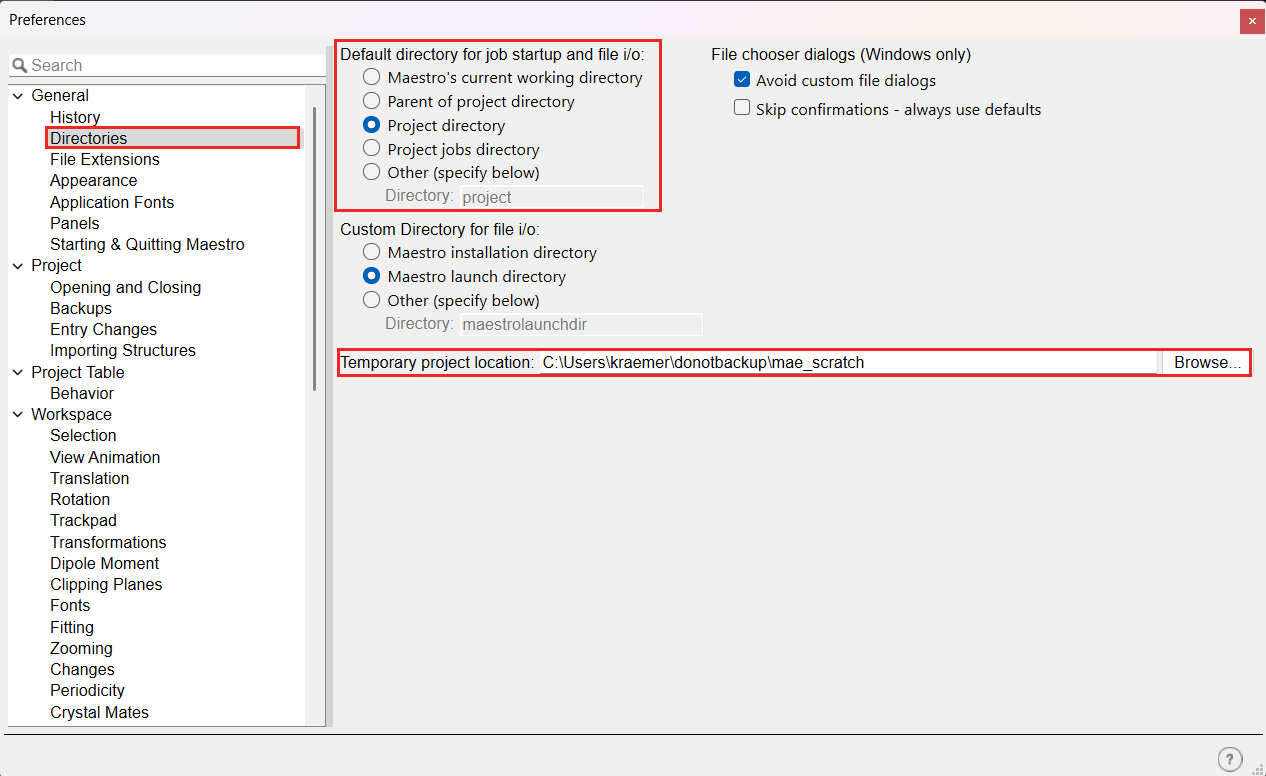
When you start Maestro without opening a named project, or after opening a .prjzip, a temporary scratch project is created. Any work you do in a scratch project is lost when you close Maestro unless you save the project as a named project (by going to File → Save Project As). You can customize the location on disk where scratch projects are stored while the associated Maestro session is active in Preferences → General → Directories → Temporary project location.
The Working Directory
Any files you generate in a Maestro session (e.g. from running jobs) will be written to the current Working Directory. This directory is also where all file chooser dialogs will initially open. The default Working Directory that Maestro uses out of the box depends on your operating system, but you can (and should) tweak the Preferences to match how you want Maestro to behave.
Housekeeping within projects
Entries are the building blocks of a Maestro project. An entry consists of zero or more molecules (structures) grouped together and assigned a title. See Project Entries for more information. Entries can have properties that are related to the entire collection of atoms (entry properties), and properties for specific atoms (atom properties). Entries can be collected into entry groups, and groups can be nested within other groups for housekeeping.
Learn more about Entries here.
You can import structures and their properties from a wide variety of other file formats, including PDB, MDL SD, Sybyl Mol2, ChemDraw, and MOE formats, native Maestro files and many others supported by the OpenBabel file conversion utility. You can also fetch structures directly from the Protein Data Bank via File → Get PDB.
Learn more about importing structures here.
Navigating the Maestro Workspace with keyboard and mouse
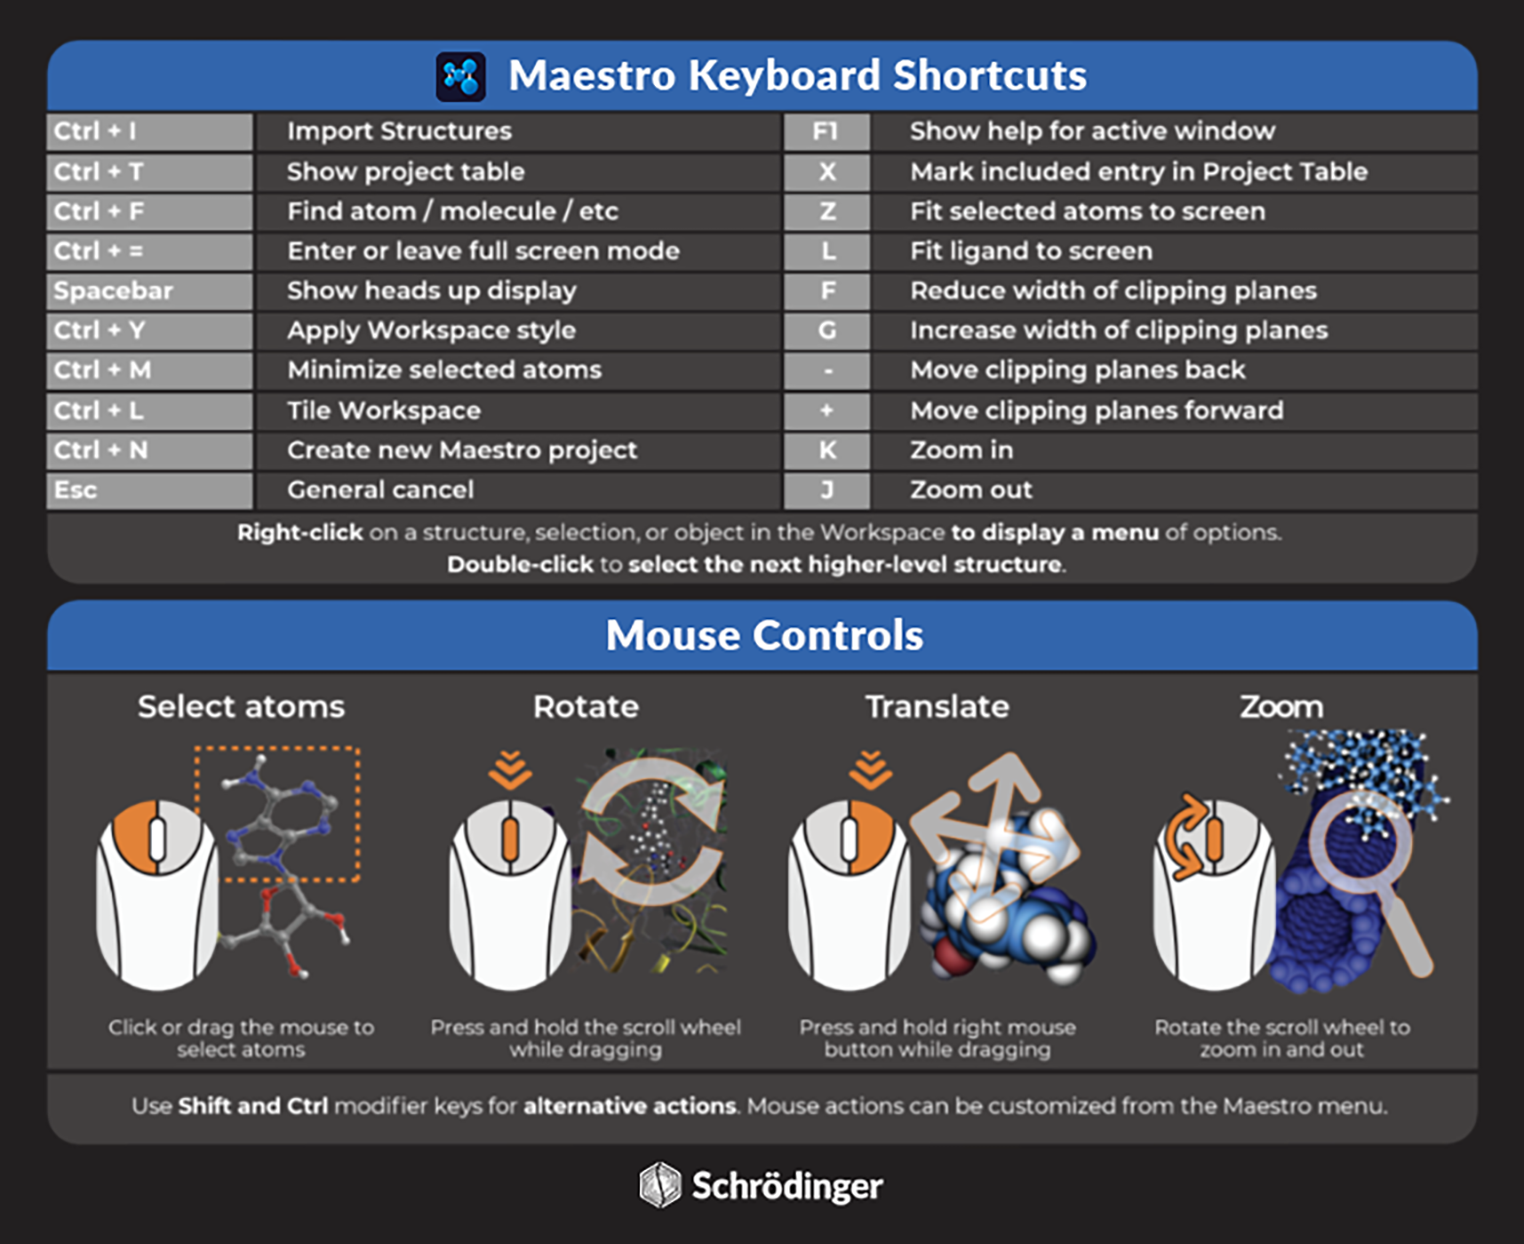
Common mouse actions for interacting with structures in the Workspace

Maestro keyboard shortcuts and mouse controls
Workspace selections
Maestro works on a select-first paradigm. This means that if you want to change the look of a molecule in the Workspace or you want to modify part of a structure, you first need to select those atoms within the Workspace. There are several ways to select atoms in the workspace. The two main approaches are:
- With the mouse
- Using selection sets
Left-click to select parts of the structure in the workspace. The selection scope for a single click is controlled with the select by type button (or the corresponding keyboard shortcuts). Double- and multiple clicks select increasingly larger parts of the structure. Shift and Ctrl work as expected. Click and drag can make rectangular or lasso selections.

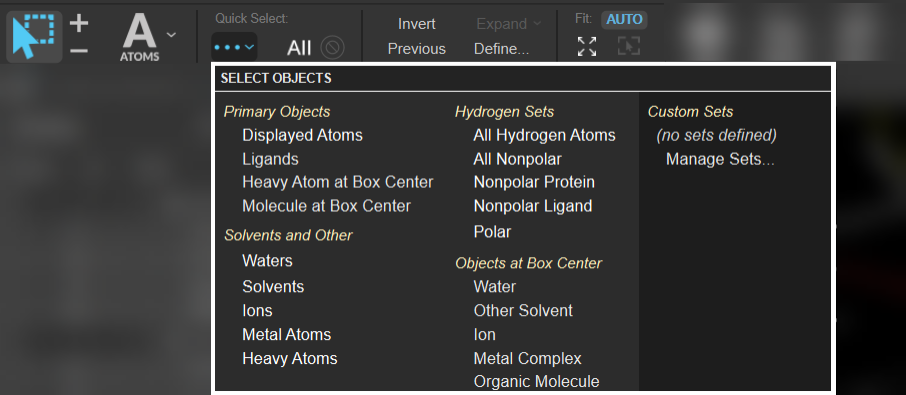
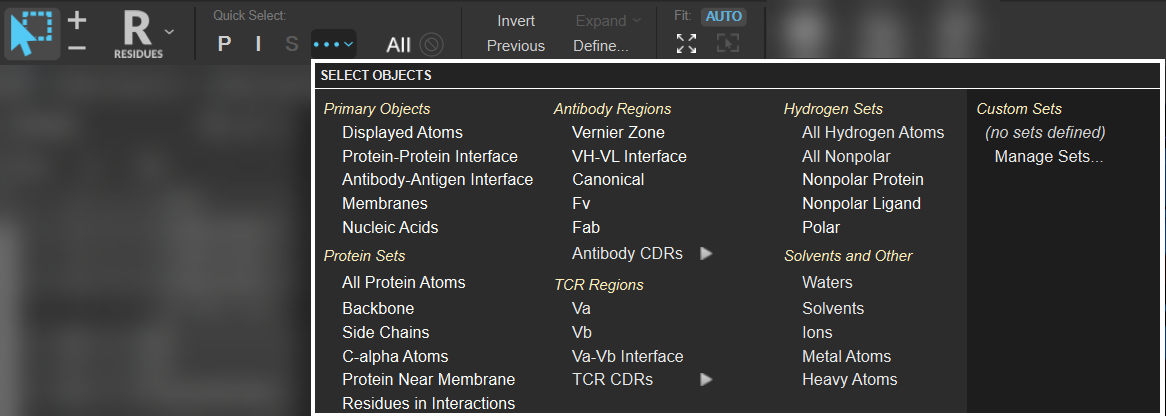
Hover over buttons in the image to see a short explanation, click to open the corresponding documentation page.
What's next?
We recommend running through our Introduction to Structure Preparation and Visualization and A Chemist's Guide to Maestro tutorials for guided examples of basic structure visualization and editing workflows in Maestro. You can also browse our tutorial library for step-by-step examples covering various workflows. If you are unsure what resources are available for a given scientific workflow, explore our learning paths or online certification courses.