Electrolyte Analysis Calculations Panel
Analyze the coordination environment of transference ions in electrolytes from molecular dynamics trajectories. The coordination can be used to analyze the ion transport characteristics of electrolytes.
To open this panel: click the Tasks button and browse to Materials → Classical Mechanics → Trajectory Analysis → Electrolyte Analysis Calculations.
The following licenses are required to use this panel: MS Maestro
- Using
- Features
- Additional Resources
Using the Electrolyte Analysis Calculations Panel
The input for this panel is a trajectory from an MD simulation. You can run MD simulations using the MD Multistage Workflow Panel or the Diffusion Coefficient Panel.
If the system contains multiple cationic molecule types, you can select the one to use as the transference ion. Likewise, you can select the anionic molecule type to be used as the counterion for the analysis.
As a result of this calculation, a new entry group is created in the Project Table with structures from the final frame analyzed. The first entry shows all clusters of coordinated transference ions. The remaining entries show each transference ion with its coordination sphere, individually.
You can plot the results of the calculation using the Electrolyte Analysis Viewer Panel (click the Tasks button and browse to Materials → Classical Mechanics → Trajectory Analysis → Electrolyte Analysis Results). To open this panel from the entry group for the results of a job .
.
To write out the input file and a script for running the job from the command line, click the arrow next to the Settings button  and choose Write.
Electrolyte Analysis Calculations Panel Features
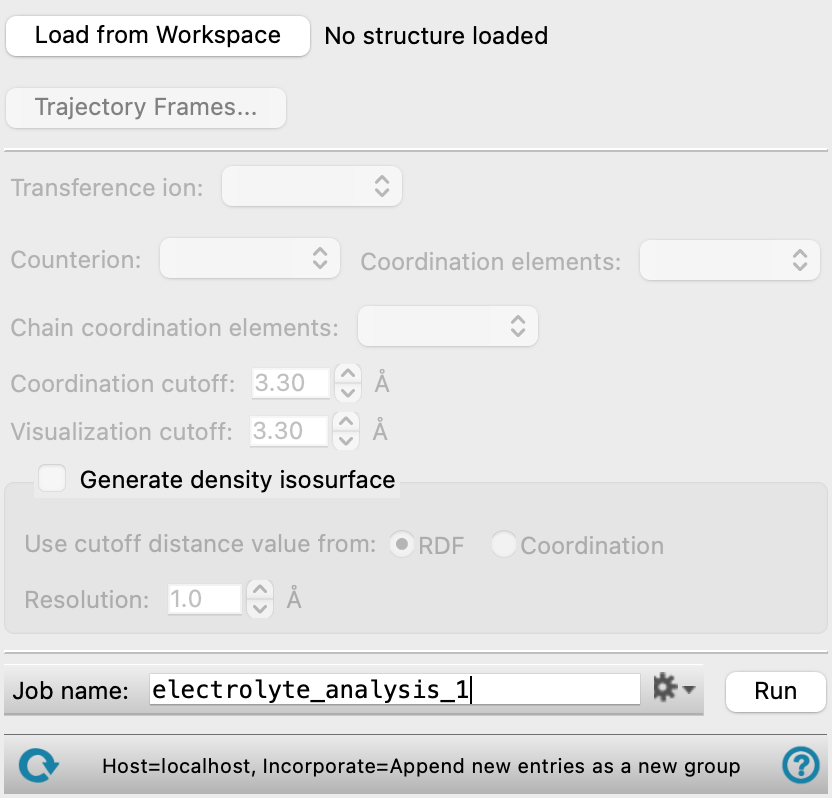
- Load from Workspace button
-
Load the trajectory that is associated with the structure in the Workspace.
- Trajectory Frames button
-
Set the range and interval of trajectory frames to use in the analysis. The total number of frames to be used and the time range (in ns) corresponding to the selected frames are shown to the right of the button. Opens the Trajectory Frames dialog box, in which you can set the following:
-
- Frame range text boxes—Set the range of frames to use. You can also use the slider to select the range.
- Step size text box—Set the interval at which trajectory frames are taken. For a step size of n, every nth frame is taken within the selected range. The first and last frames are always included. Increasing the step size decreases the number of frames to be used and the computational time needed.
- Frames text—Lists the corresponding frame numbers of the selected frame range and step size.
- Time text—Lists the corresponding time range and interval (in ns) of the selected frame range and step size.
- OK button—Apply the selected trajectory frame range and step size and close the dialog box.
- Transference ion menu
-
Select the cation species to use as the transference ion. If you select a polyatomic species, you must use the Select Atom option to choose which atom within the molecule should be treated as the "transference ion" for the purposes of the calculation.
- Select Atom option
-
Click on this option after selecting a polyatomic species from the Transference ion menu. In the Workspace, pick an atom on one of the molecules of the polyatomic species. The atom you picked is representative of what is used as the "transference ion" for which coordination is calculated in all the molecules of the polyatomic species in the system. The name of the selected atom appears as text to the right of the Select Atom option.
Only present if a polyatomic species is selected as the Transference ion.
- Counterion menu
-
Select the anion species to use as the counterion.
- Coordination element menu
-
Select coordination elements from the chosen counterion. The coordination of the selected elements with the transference ion is calculated when the job is run. All elements in the species selected in the Counterion menu except for C and H are displayed in the Coordination element menu. Multiple elements can be selected.
- Chain coordination element menu
-
Select coordination elements from any species that is not the transference ion or counterion. All elements in those species except for C and H are displayed in the Chain coordination element menu. Multiple elements can be selected.
- Coordination cutoff text box
-
Enter the maximum coordination distance between transference ion and coordination elements, in angstroms.
- Visualization cutofftext box
-
Enter the size of the coordination sphere around the transference ions for the visualization, in angstroms.
- Generate density isosurface option and section
-
Select this option to calculate the density isosurface of the selected Transference ion with respect to the center of mass of the selected Counterion. Specify parameters for the calculation in this section.
This option must be selected to view the Density Isosurface tab of the Electrolyte Analysis Viewer Panel.
- Use cutoff distance value from options
-
Transference ions within the specified cutoff distance, Angstrom, are considered for the density isosurface. Select RDF to use the distance from the maximum peak of the RDF function. Choose Coordination to apply the value specified for the Coordination cutoff.
- Resolution text box
-
Specify the grid resolution, or space between the grid points, when calculating the isosurface.
- Job toolbar
-
Manage job submission and settings. See Job Toolbar for a description of this toolbar.
The Job Settings button opens the Electrolyte Analysis Calculations - Job Settings Dialog Box, where you can make settings for running the job.
- Status bar
-
 to reset the panel to its default settings and clear any data from the panel.
If you can submit a job from the panel, the status bar displays information about the current job settings and status for the panel. The settings include the job name, task name and task settings (if any), number of subjobs (if any) and the host name and job incorporation setting. The job status can include messages about job start, job completion and incorporation.
The status bar also contains the Help button
 , which opens an option menu with choices to open the help topic for the panel (Documentation), launch Maestro Assistant, or if available, choose from an option menu of Tutorials. If the panel is used by one or more tutorials, hover over the Tutorials option to display a list of tutorials. Choosing a tutorial opens the tutorial topic.