Prepare for MD Panel
Prepare the structure in the Workspace for MD simulations, by cleaning up bond orders, selecting a force field, and creating a simulation box by running the Desmond System Builder. The structure can be atomistic or coarse-grained.
To open this panel, click the Tasks button and browse to Materials → Classical Mechanics → MD Simulations → Prepare for Molecular Dynamics.
You can also open this panel with the Workflow Action Menu  for a project entry that contains results of a Disordered System Builder job that did not create a Desmond model system, or a Build Slabs and Interfaces job.
The following licenses are required to use this panel: MS Maestro, OPLS (optional), MS CG (optional), MS Force Field Applications (optional)
- Using
- Features
- Additional Resources
Using the Prepare for MD Panel
This panel is intended for the creation of model systems that can be used in a Desmond simulation. It takes each specified structure and fixes the bond assignments as necessary, then runs the Desmond System Builder to create the simulation box with the chosen force field.
The periodic boundary conditions used for the simulation box are taken from the first item on the following list for which the periodic boundary conditions exist.
- Existing Desmond system periodic boundary conditions
- Periodic boundary conditions from the crystal builder
- Periodic boundary conditions from PDB properties
If none of these sets of periodic boundary conditions exist, a new set created that is the same size as the system in the x, y and z directions, with a minimum width of 3.4Å.
When providing multiple structures as input, a CMS file is generated for each prepared structure, named according to the structure title. If you choose to incorporate the structures into the project, each prepared structure is in its own entry group, and the group has a Workflow Action Menu that you can use to open the MD Multistage Workflow Panel with the group selected as input.
To write out the input file and a script for running the job from the command line, click the arrow next to the Settings button  and choose Write.
Prepare for MD Panel Features
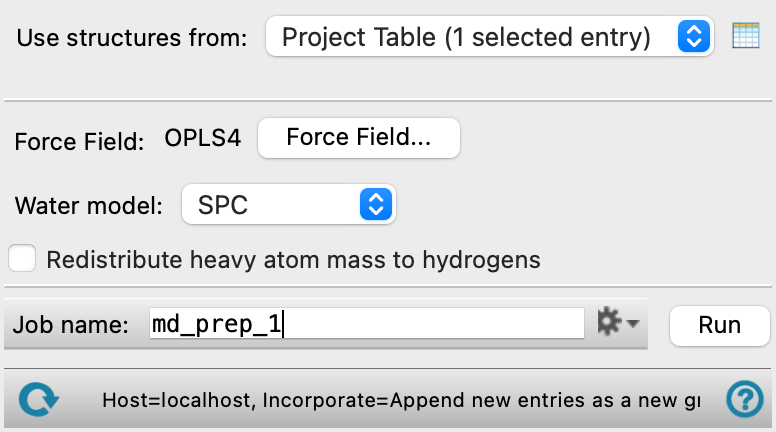
- Use structures from option menu
- Open Project Table button
- File name text box and Browse button
- Force Field button
- Water model option menu
- Redistribute heavy atom mass to hydrogens option
- Coarse-grained force field option menu
- Use particle mesh Ewald Method option
- Scale lattice vectors option
- Job toolbar
- Status bar
- Use structures from option menu
-
Choose the structure source for preparation for MD.
- Project Table (n selected entries)—Use the entries that are currently selected in the Project Table or Entry List. The number of entries selected is shown on the menu item.
- Workspace (n included entries)—Use the entries that are currently included in the Workspace, treated as separate structures. The number of entries in the Workspace is shown on the menu item.
- File—Use the specified file. When this option is selected, the File name text box and Browse button are displayed.
- Project Table (n selected entries)—Use the entries that are currently selected in the Project Table or Entry List. The number of entries selected is shown on the menu item.
- Open Project Table button
-
Open the Project Table panel, so you can

- File name text box and Browse button
-
Enter the file name in this text box, or click Browse and navigate to the file. The name of the file you selected is displayed in the text box.
- Force Field button
-
Click the Force Field button to specify the force field to use and any custom charges, in the Force Field Dialog Box. The current force field is shown to the left of the button.
- Water model option menu
-
If water is one of the components of the system, choose the water model for the simulations. The water models available on the menu depend on the force field. For OPLS4, the models are SPC, SPCE, TIP3P, TIP4P, TIP4P2005, TIP4PEW, TIP5P, TIP4PD. For OPLS_2005, only the SPC and TIP3P models are available. If the water model is already assigned, choose Current to retain this model.
-
Only present when the system is an atomistic system.
- Redistribute heavy atom mass to hydrogens option
-
Redistribute some of the mass of heavy atoms to bonded hydrogen atoms. This allows shorter time steps to be used and avoid some of the instability due to high-frequency hydrogen motions.
Only present when the system is an atomistic system.
- Coarse-grained force field option menu
-
Choose the coarse-grained force field for the simulation. The choices depend on the Location option selected. The installation contains the Martini and Martini_solution force fields. The menu is populated with the coarse-grained force fields you have saved if you choose Local for the Location. Only present for a coarse-grained system.
-
- Description button
-
Display a description of the chosen force field in a separate panel.
- Location options
-
Select an option for the location of the coarse-grained force field. The force fields listed on the Force field option menu depend on this choice.
- Installation—use the force fields in the installation. These are the Martini, Martini_solvation, or Martini_full force fields [15].
- Local—import a force field from your local user resources directory. These are force fields that you have saved for your own use.
- Use particle mesh Ewald Method option
-
Electrostatic interactions are calculated with the particle mesh Ewald (PME) method when using a Martini force field instead of cutoff parameters. Only available if the system is a coarse-grained system and a Martini force field is selected.
- Scale lattice vectors option
-
Scale the volume of the system to match the nonbonded cutoff distance and reduced density of the force field. Only available if the system is a coarse-grained system and a DPD force field is selected.
- Job toolbar
-
Manage job submission and settings. See Job Toolbar for a description of this toolbar.
The Job Settings button opens the Prepare for MD - Job Settings Dialog Box, where you can make settings for running the job.
- Status bar
-
The status bar displays information about the current job settings and status for the panel. The settings includes the job name, task name and task settings (if any), number of subjobs (if any) and the host name and job incorporation setting. The job status can include messages about job start, job completion and incorporation.
Use the Reset button
 to reset the panel to its default settings and clear any data from the panel.
 The status bar also contains the Help button
 , which opens the help topic for the panel in your browser. If the panel is used by one or more tutorials, hovering over the Help button displays a
  button, which you can click to display a list of tutorials (or you can right-click the Help button instead). Choosing a tutorial opens the tutorial topic.